
Paper Jams in the Main Unit
Check the paper jam location on the screen, and follow the procedure below to remove the paper.
 |
Confirm before handlingBefore starting the operation to clear paper jams, confirm that the covers and paper drawers of the machine and optional equipment are closed. |
1
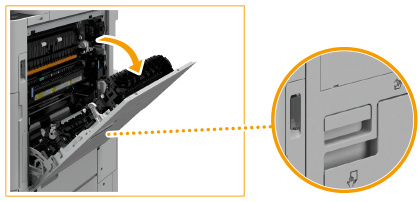
Open the right cover of the main unit.
2
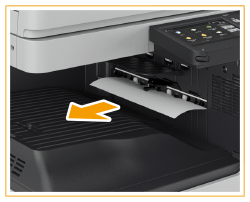
Check whether paper is jammed in the output tray of the main unit.
If paper is jammed, gently pull it out in the direction of the arrow.
3
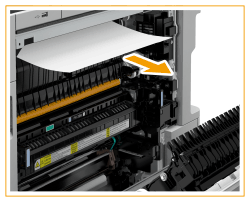
Check whether paper is jammed in the output area or reversing unit.
If paper is jammed, gently pull it out in the direction of the arrow.
4
Check whether paper is jammed in the fixing assembly.
 | Open the upper cover of the fixing assembly. 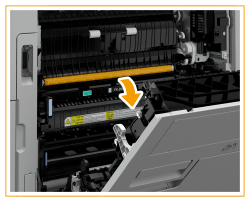 |
 | If paper is jammed, gently pull it out in the direction of the arrow. 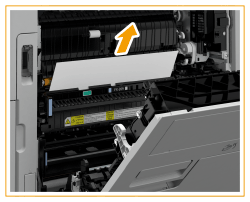  If you cannot remove the paper via the top side of the fixing assembly, gently pull it out via the bottom side of the assembly. 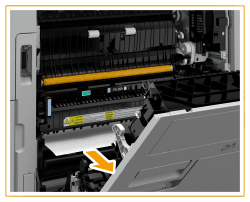 |
 | Return the upper cover of the fixing assembly back to position. |
5
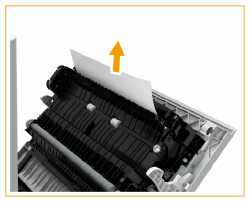
Check whether paper is jammed in the output area on the side of the main unit's right cover.
If paper is jammed, gently pull it out in the direction of the arrow.
6
Check whether paper is jammed in the duplexing unit.
 | Lift the handle up in the direction of  and open the duplex unit in the direction of and open the duplex unit in the direction of  . .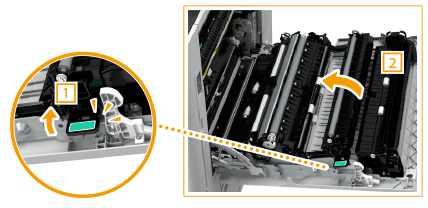 |
 | If paper is jammed in the upper area of the duplexing unit, gently pull it out in the direction of the arrow. 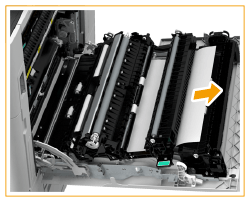 |
 | Return the duplex unit back into position. |
 | If paper is jammed in the lower area of the duplexing unit, gently pull it out in the direction of the arrow. 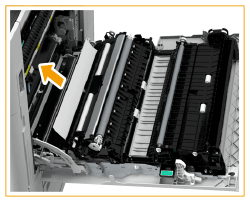 |
7
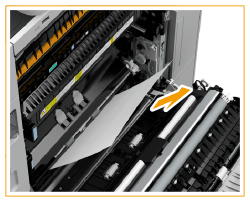
Check whether paper is jammed around the paper drawer 1.
If paper is jammed, gently pull it out in the direction of the arrow.
8
Gently close the right cover of the main unit until they click.
Continue following the instructions on the screen to proceed with the interrupted operation or continue clearing paper jams.