Checking Scanned Images Before Sending (Preview)
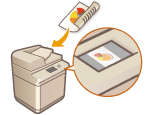
 | You can check scanned images on the preview screen before sending. You can also delete, move, or switch pages on the preview screen. |
 |
The original cannot be checked before sending with the Direct Sending or Manual Sending mode, even if <Preview> is set. |
1
Place the original. Placing Originals
2
Press <Fax>. <Home> Screen
3
Specify the destination on the Fax Basic Features screen. Fax Basic Features Screen
4
Specify the scan settings as necessary. Basic Operations for Sending Faxes
5
Press <Options>  <Preview>
  <Close>.
 <Preview>
  <Close>.
6
Press  (Start).
 (Start).
Originals are scanned and the preview screen appears.
To cancel scanning, press <Cancel> or  (Stop)
  <Yes>.
 (Stop)
  <Yes>.
 When <Press the [Start] key to scan the next original.> is displayed
Place the next original to scan and press  (Start). When scanning all of the originals is complete, press <Preview and Send> to display the preview screen.
 (Start). When scanning all of the originals is complete, press <Preview and Send> to display the preview screen.
7
Check the scanned images on the preview screen.
Edit the scanned image on the preview screen as necessary.
 To delete a page
You can delete the page currently displayed on the preview screen.
1 | Press <Delete Page>. |
 To move a page
You can move a page to the specified destination.
1 | Press <Edit Scanned Data>. |
2 | Press <Move Pg. Position>. |
3 | Enter the page numbers corresponding to <Move Page> and <Behind Page>. |
4 | Press <OK>. |
 To switch the locations of pages
You can switch the locations of specified pages.
1 | Press <Edit Scanned Data>. |
2 | Press <Switch Pg Position>. |
3 | Enter the page numbers corresponding to <Target Page A> and <Target Page B>. |
4 | Press <OK>. |
8
Press <Start Sending>.
Sending starts.