Registering Fonts
This section describes the procedure for registering fonts.
NOTE |
A font registration chart is used for registering fonts. Print the font registration chart using the following settings. Specify the paper size to be used in the print job Magnification: 100% Layout: Centered |
1.
Open the main screen
2.
Start the registration by using any of the following methods
Click [Font Settings] from [File] in the menu bar.
Click [Font Settings] in the toolbar.
3.
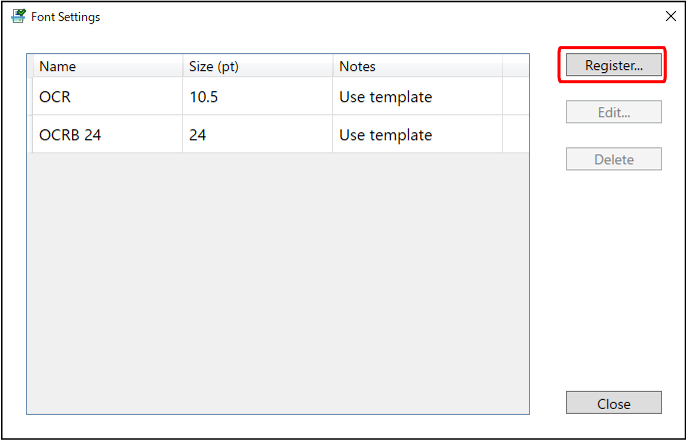
Click [Register] on the [Font Settings] screen
NOTE |
Displays a list of already registered fonts. In order to make it easier to later identify details that were registered, it is recommended that you input identification information in [Name] and [Notes]. If the characters in the chart were registered automatically, [Use template] is displayed in [Notes]. To delete registered details, select the font you want to delete on the [Font Settings] screen and click [Delete]. |
The [Job Settings (Register Font)] screen is displayed.
4.
Specify the print job paper size to be used for font registration on the [Job Settings (Register Font)] screen
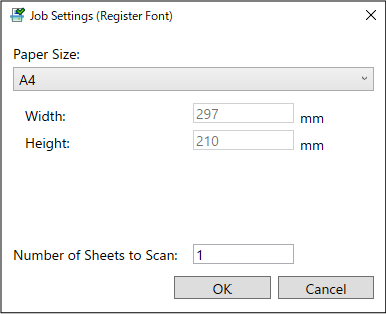
[Paper Size] | Set the paper size of the printed matter to be inspected. The size specified on the [Preferences] screen is displayed as the default value. |
[Width] | Enter a value if [Custom] is selected in [Paper Size]. |
[Height] | Enter a value if [Custom] is selected in [Paper Size]. |
[Number of Sheets to Scan] | Set the number of sheets to read. |
5.
Click [OK]
The [Register Font] screen is displayed.
6.
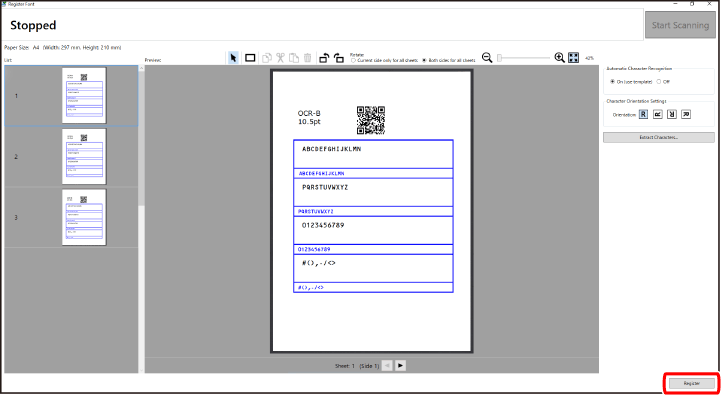
Click [Start Scanning]
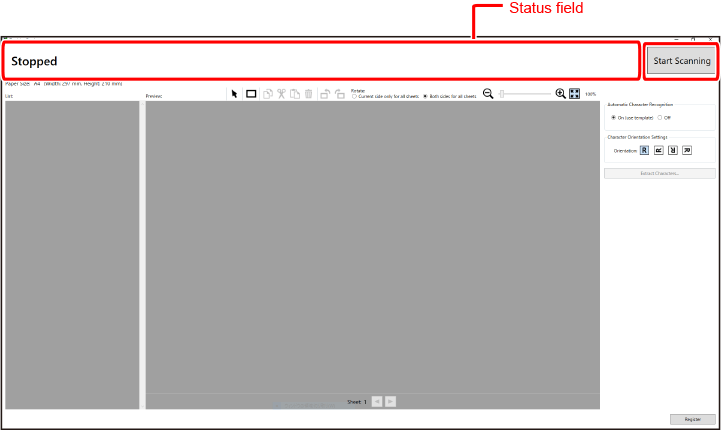
The status field changes to [Waiting to scan].
NOTE |
Scanning cannot be started while printing is underway. |
7.
After the status field changes to [Waiting to scan], execute the print job for font registration from the controller
When scanning begins, the status field changes to [Scanning].
The scanned images are displayed in the [List] on the left side of the screen.
NOTE |
The Inspection Unit scans both sides of the output paper at the same time. |

8.
Check that the print job for font registration has been completed and scanning has finished
If the status field changes to [Waiting to scan] and the number of copies scanned is not reached, there may be a problem such as a paper jam. Check the display on the printer and controller.
If the status field changes to [Error] and a message is displayed, fix the problem by referring to the following.
9.
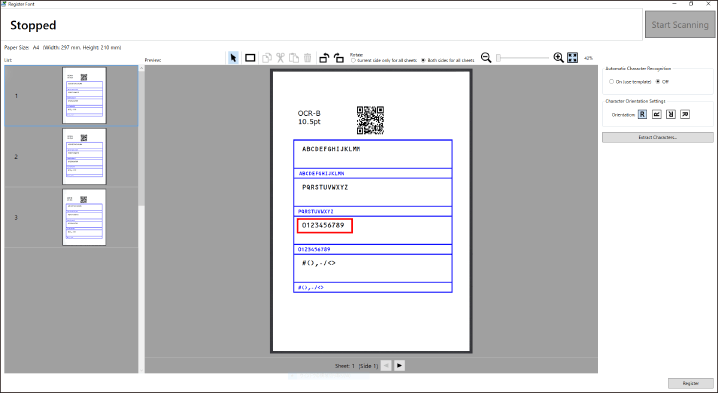
Select whether to automatically recognize text
[Automatic Character Recognition] | [On (use template)] Automatically reads all the characters in the font registration chart. Proceed to Step 12. [Off] Reads the specified characters in the font registration chart. Individually specify the characters to be read. |
10.
If [Off] is selected in [Automatic Character Recognition], select  ([Insertion tool for character area]) and then select the character area in the [Preview] area
NOTE |
You can change the rotation and the display magnification of the pages displayed on the screen. Refer to the following for details. To delete the configured text area, select the area you want to delete using |
11.
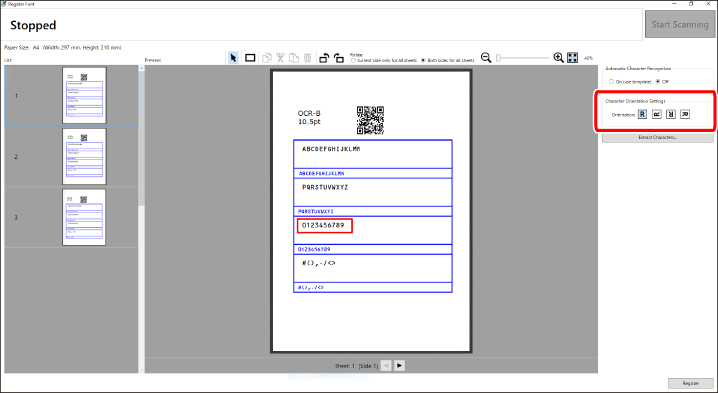
Select the orientation of the text in [Orientation] in [Character Orientation Settings]
Select the icon indicating the orientation of the characters displayed in the [Preview] area.
12.
Click [Extract Characters]
The [Extract Characters] screen is displayed.
13.
Set the text
Enter the correct character corresponding to each character image displayed in [Character List].
If [On (use template)] is selected in [Automatic Character Recognition], the characters are automatically input in [Character List]. Check that the automatically input characters are correct.
If [Off] is selected in [Automatic Character Recognition], check the trimming frames of the characters to register and enter the characters in [Character List]. You can adjust the trimming frames by using ([Insertion tool for trimming frame]).

NOTE |
You can also use To add a character input frame to [Character List], click To delete cutout character images from [Character List], click When registering fonts, check that there are no spots or other defects on the font image you want to register. If it contains defects, either perform the font registration again or adjust the trimming frame so that it does not contain the defects. |
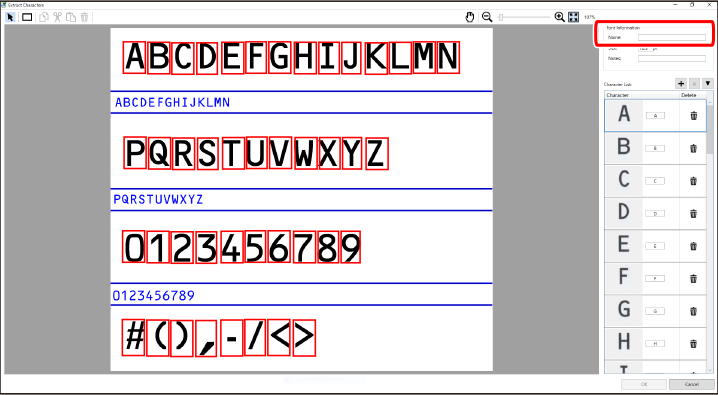
Input the font name in [Name] of [Font Information].
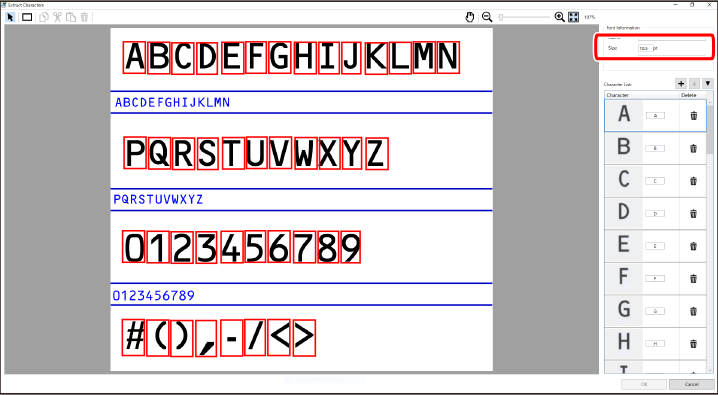
Input the font size in [Size] of [Font Information].
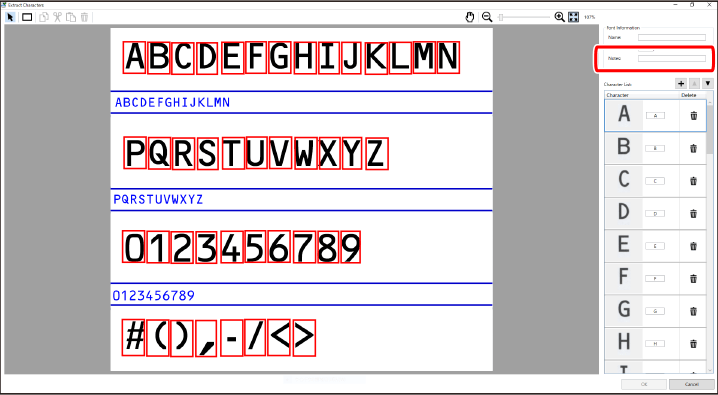
Input the font information in [Notes] of [Font Information].
NOTE |
The [Notes] input here are displayed on the [Font Settings] screen. It is recommended that you enter information that makes it easy to later identify the details that were registered. Examples: "Letters only", "Numbers only" If [On (use template)] is selected in [Automatic Character Recognition], [Use template] is displayed. Although [Name] and [Notes] can be edited even after registration, the font size cannot be changed after registration. |
14.
Click [OK]
The [Register Font] screen is displayed.
NOTE |
To register another font subsequently, either go to a desired page in the [List] or click |
15.
Click [Register]
The details of the registered font are displayed on the [Font Settings] screen.
NOTE |
When [Automatic Character Recognition] is set to [On (use template)] A green bar is displayed in the [List] for registered fonts. 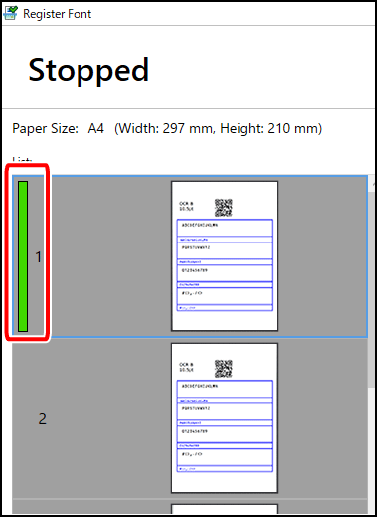 |
To change the registered font, select the font to change and register the font again.