Replacing the Waste Toner Container
The machine has two waste toner containers and uses the containers in order. When one of the waste toner containers is full, a message is displayed prompting you to prepare a new waste toner container, and the toner in use will automatically switch to the other one. Perform replacement of the container full of waste toner according to the displayed message.
|
Do not replace the waste toner container before the message prompting you to replace it appears on the touch panel display. A message prompting you to prepare a new waste toner container can appear before the replacement message, however, do not replace the waste toner container at this time. The used waste toner container will be collected by your service representative. Used toner cannot be reused. Do not mix new and used toner together. Make sure to use the dedicated waste toner container for this machine. |
 |
The waste toner container is a container for collecting unused toner that remains when printing. For details about each message, see Countermeasures for Each Message. For information on the model number of the waste toner container, see Consumable Parts. Complete instructions on how to replace the waste toner container can be accessed by pressing <Previous> or <Next> on the touch panel display. The waste toner container can be replaced even while the machine is in operation. You can print for a while without replacing the waste toner container, however, we recommend that you replace it as soon as possible. You can check the current amount of space remaining in the waste toner container. Checking the Space Remaining in the Waste Toner Container |
Procedure for Replacing the Waste Toner Container
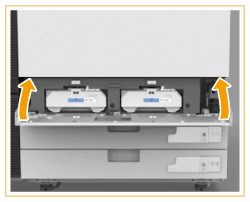
1
Open the waste toner cover.
Hold both edges of the cover when opening it.
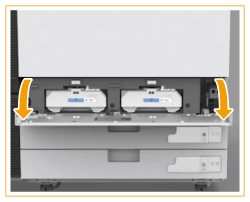
2
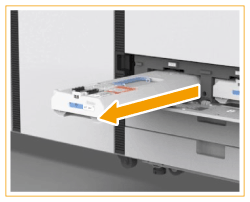
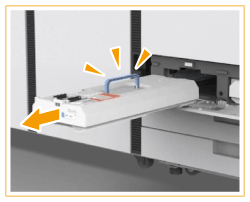
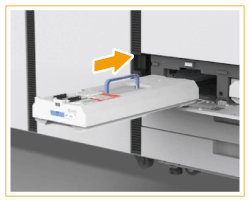
Hold the handle of the waste toner container full of waste toner and pull it out.
Press the message  to display the waste toner container to be replaced.
to display the waste toner container to be replaced.After pulling out the waste toner container half way, hold the handle on the top and pull it out all the way.

After checking which waste toner container is full, pull out the corresponding waste toner container.
Do not tilt the waste toner container. Doing so may cause the toner in the container to spill.
If you accidentally pull out the waste toner container in use
Set the waste toner container that was pulled out immediately when a message prompting you to set the waste toner container is displayed. If you leave it, the print or copy job will stop soon.
When the job stops, set the waste toner container that was pulled out back to the original position, and the job will restart.
3
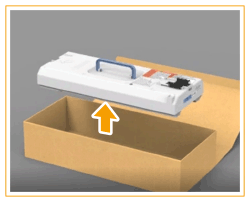
Remove the new waste toner container from its box.
4
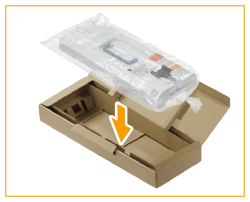
Place the waste toner container you removed into a box.
Use the bag included in the box for the new waste toner container. Tightly twist the opening of the bag so that the toner does not spill out, and then place the bag in the box.
5
Install the new waste toner container.
Insert the waste toner container with the Canon logo on top of the container towards the back of the machine, and push it in to load it.
Push the waste toner container in as far as it will go. If the waste toner container is not installed correctly, the container shutter may stay open when the waste toner container is removed, which may cause toner to scatter.
6
Close the waste toner cover.