Saving Documents in the Advanced Box
Follow the procedures below to save scanned documents in the Advanced Box. You can use this convenient method when you want to digitize many documents so that you can share the information with the staff in a department in a paperless environment.
 |
We recommend that you delete unwanted files or image data from the Advanced Box to make space for storing new documents. You can also send documents to the Advanced Box by specifying it as the destination from <Scan and Store>. For instructions on sending documents to the Advanced Box, see Registering Destinations in the Address Book. |
1
Set the original. Placing Originals
2
Press <Scan and Store>. <Home> Screen
3
Press <Advanced Box>.
4
Press <Shared Space> or <Personal Space>.
For information on the items on the screen and instructions on how to use them, see Working with Files and Folders in the Advanced Box.
5
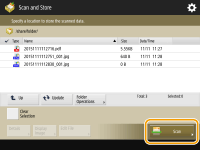
Display the save location and press <Scan>.

6
Specify the scan settings as necessary.
For scan settings, see Setting Screen and Operations for Scanning to Save.
7
Press  (Start).
 (Start).
Originals are scanned and saved as files.
To cancel scanning, press <Cancel> or  (Stop)
  <Yes>.
 (Stop)
  <Yes>.
 When <Press the [Start] key to scan the next original.> is displayed
Place the next original to scan and press  (Start). After scanning all of the originals, press <Start Storing> to save the file.
 (Start). After scanning all of the originals, press <Start Storing> to save the file.
To check the result of saving, press  (Status Monitor)
  <Store>
  <Job Log>. If <NG> is displayed, the file is not saved successfully. Try the operation again.
 (Status Monitor)
  <Store>
  <Job Log>. If <NG> is displayed, the file is not saved successfully. Try the operation again.