Registering Groups to the Address Book (Remote UI)
You can register a group of multiple destinations to the Address Book using Remote UI from a computer.
You can register only the same type of destinations for a group. You cannot register file save locations (shared folder or FTP server) to a group.
You can register only the same type of destinations for a group. You cannot register file save locations (shared folder or FTP server) to a group.
Administrator privileges are required to register a group using Remote UI.
Required Preparations |
Register the destinations to be added to a group to the Address Book of the machine. Registering Destinations to the Address Book (Remote UI) |
1
Log in to Remote UI in System Manager Mode. Starting Remote UI
2
On the Portal page of Remote UI, click [Address Book]. Portal Page of Remote UI
3
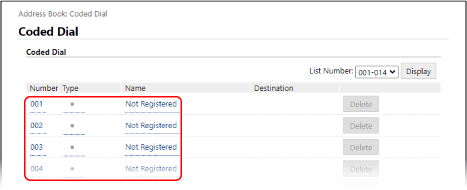
Click [Favorites] or [Coded Dial].
4
Click an item displayed as [Not Registered].

The [Register New Destination] screen is displayed.
If the [Enter PIN] screen is displayed, enter the Address Book PIN, and then click [OK].
5
Select [Group], and click [OK].
The [Register New Destination: Group] screen is displayed.
6
In [Group], enter the group name.
You can register a group without entering its name, but by entering the name, you can search for it by its initials when specifying the destination.
7
In [Member Settings], click [Select from Address Book].
8
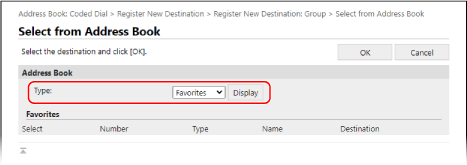
Change the display of the Address Book, as needed.

In [Type], select [Favorites] or [Coded Dial], and click [Display] to change the display of the Address Book.
9
Select the checkboxes of the destinations to add to the group, and click [OK].
The destinations are added to [Member List] on the [Register New Destination: Group] screen.
You can select multiple destinations at the same time.
10
Click [OK].
The group is registered to the Address Book.
11
Log out from Remote UI.