Scanning (Saving to a Shared Folder or FTP Server)
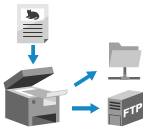 | You can scan an original and save the scanned data to a shared folder on a computer or FTP server. This is convenient for sharing the scanned data of a paper document on a network. |
Required Preparations |
Register the information for accessing the shared folder and/or FTP server to the Address Book of the machine. Preparing to Save Scanned Data to a Shared Folder Preparing to Save Scanned Data to an FTP Server |
1
Place the original. Placing Originals
2
On the operation panel, press [Scan] in the [Home] screen. [Home] Screen
The scan type selection screen is displayed.
3
Press [File].
The scan screen is displayed.
4
On the [Specify Destination] tab, specify the destination. Specifying Destinations
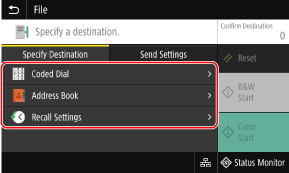
 If you can only specify [Specify Myself as Destination]
If the destination when sending is restricted due to the Authentication Settings for Send Function, you cannot specify another destination. For details, contact the administrator.
5
Configure the scan settings on the [Send Settings] tab. Scan Settings
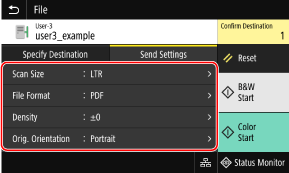
Scanned data is saved with the following file name. You can also use the [Send Settings] tab to add a specified custom string to the start. Setting File / Division

 Communications management number
 Date saved (in this example, "April 5, 2023, 9:12:34 AM")
 File sequence number (if one file, then "001")
6
Press [Start B&W] or [Start Color].
Scanning of the original starts.
To scan the original in black and white, press [Start B&W], and to scan in color, press [Start Color].
To cancel scanning, press [Cancel]  [Yes]. Canceling Scanning
 [Yes]. Canceling Scanning
When scanning is completed, the scanned data is saved. Use [Status Monitor] to view the save status and log. Checking the Send and Save Status and Log of Scanned Data
 When [Confirm Destination] appears
Check that the destination is correct, and then press [Start Scanning].
 When [Scan Next Original] appears
After the original is placed on the platen glass and is scanned in PDF or TIFF format, the screen for scanning additional originals is displayed.
To continue scanning originals, place on the platen glass, and press [Scan Next Original].
When scanning of all documents is completed, press [Start Sending] or [Preview & Send].
To continue scanning originals, place on the platen glass, and press [Scan Next Original].
When scanning of all documents is completed, press [Start Sending] or [Preview & Send].
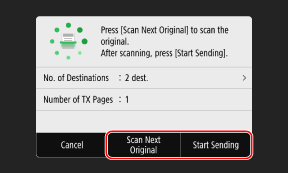
* If the original has different size pages, part of the image may be missing, or the image may be scanned smaller.
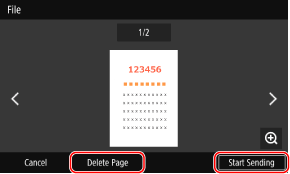
 When the preview screen appears
Preview the scanned data before press [Start Sending].
If there are pages you do not want to send, open the page and press [Delete Page].
If there are pages you do not want to send, open the page and press [Delete Page].
 When [Status Monitor] appears
To view the save status and log, press [Status Monitor]. Checking the Send and Save Status and Log of Scanned Data
Pressing [Close] displays the scan screen.
Pressing [Close] displays the scan screen.

 When [File Authentication] appears
Enter the user name and password to be used to access the shared folder or FTP server, and then press [Apply].