
Stack Bypass Alignment Tray-D
By using the Stack Bypass Alignment Tray-D, you can reduce the amount of skew of paper (i.e. paper is fed diagonally) which is fed from the multi-purpose tray, and prevent the image misalignment.
 |
If the POD Deck Lite-C is attached, be careful not to get your hands caught in the gap between the Stack Bypass Alignment Tray-D and the POD Deck Lite-C when clearing paper jams. |
 |
You cannot pull out the auxiliary tray of the multi-purpose tray when the Stack Bypass Alignment Tray-D is attached. For information on paper weight and paper size that can be used with the Stack Bypass Alignment Tray-D, see items for the multi-purpose tray in "Available Paper" |
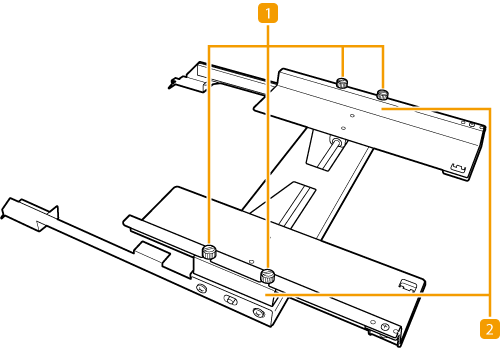
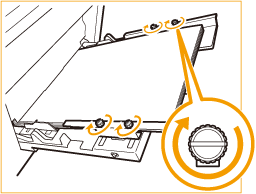
 Fixing screws
Tighten or loosen the screws to adjust the paper alignment guides.
 Paper alignment guides
Stabilize the position of the loaded paper.
Loading Paper with the Stack Bypass Alignment Tray-D
By fixing the position of the paper alignment guides of the Stack Bypass Alignment Tray-D according to the paper size, you can reduce the amount of skew of paper fed from the multi-purpose tray and thus reduce the amount of image misalignment.
1
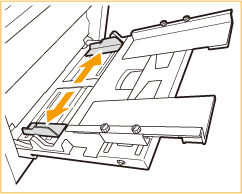
Spread the paper guides of the multi-purpose tray outward.
Ensure that the distance between the paper guides is slightly larger than the paper width.
2
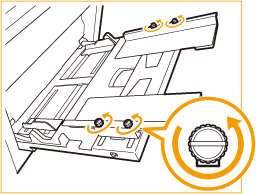
Loosen the four fixing screws of the paper alignment guides.
3
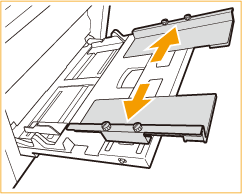
Spread the paper alignment guides outward.
Ensure that the distance between the paper alignment guides is slightly larger than the paper width.
4
Prepare paper.
Fan the paper stack well, and tap it on a flat surface to align the edges.
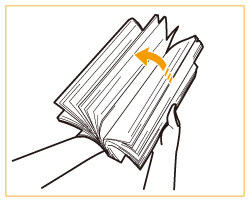

Fan all four sides of the paper stack well.
Make sure that there is enough air between them.
In particular, separate each sheet completely when using transparencies.
5
Insert the paper into the multi-purpose tray until the paper stops.
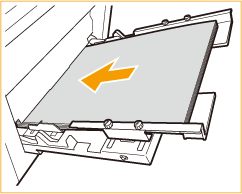
Load the paper with the print side face up.
The screen for specifying the paper size and type is displayed when the paper is fully inserted.

Do not exceed the load limit line when loading paper
Make sure that the paper stack does not exceed the load limit line ( ). Loading too much paper can cause paper jams.
 ). Loading too much paper can cause paper jams.
6
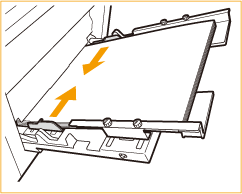
Adjust the distance between the paper guides of the multi-purpose tray to the paper size.
7
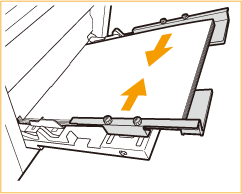
Adjust the paper alignment guides to match the size of the paper.
Leave no space between the stack of paper and the guides.
8
Repeat steps 6 and 7 once or twice, and align the paper guides of the multi-purpose tray and the paper alignment guide to match the size of the paper.
To prevent the copied images from being slanted or misaligned, make sure that the edges of the stack of paper are neatly aligned in steps 6 and 7.

If the paper alignment guide is adjusted narrower than the paper size, paper feeding may not be possible.
9
Tighten the four fixing screws of the paper alignment guides to stabilize the paper alignment guide.
Tighten the four fixing screws at the front and the back.
10
Check the paper size and paper type, and press <OK>.
If you load free size paper, or if the displayed size or type is different from the actual paper that is loaded, see Specifying Paper Size and Type in the Multi-purpose Tray.