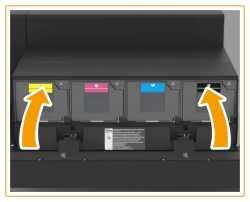
 ] on the bottom right and replace the toner cartridge for the displayed color.
Replacing the Toner Cartridge
When the message for replacing the toner cartridge is displayed on the touch panel display, press [ ] on the bottom right and replace the toner cartridge for the displayed color.
 ] on the bottom right and replace the toner cartridge for the displayed color.
When the Black toner or all of the toners run out completely and prints can no longer be made, a screen with instructions on how to replace the toner cartridge appears on the touch panel display. Follow the procedure described below to replace the toner cartridge.
If you press <Close>, you can continue operations, such as setting modes, even if you do not replace the toner cartridge immediately.

The location of the toner cartridge is indicated in the following illustration.

 |
Do not burn or throw used toner cartridges into open flames, as this may cause the toner to ignite, resulting in burns or a fire. If you accidentally spill or scatter toner, carefully gather the toner particles together or wipe them up with a soft, damp cloth in a way that prevents inhalation. Never use a vacuum cleaner that does not have safeguards against dust explosions to clean up spilled toner. Doing so may cause a malfunction in the vacuum cleaner, or result in a dust explosion due to static discharge. |
 |
If toner is ingested, consult a physician immediately. If toner gets onto your hands or clothing, wash it off immediately with cold water. Washing it off with warm water will set the toner, and make it impossible to remove the toner stains. Store toner containers as described below Store toner containers in the following conditions: Storage temperature range: 20-27 ℃ Storage humidity range: 15 % to 60 %RH (relative humidity, condensation-free)* * Even within the approved storage humidity range, water droplets (condensation) may develop inside the toner container if the temperatures inside and outside the toner container differ. Condensation will adversely affect the print quality. Store unopened until immediately prior to use. Do not store toner containers in the following locations: Locations exposed to open Flames Locations exposed to direct sunlight Locations exposed to excessively salty air Locations heavily exposed to corrosive gases (e.g. aerosol sprays or ammonia) Very hot and/or humid Locations Locations subject to dramatic changes in temperature and humidity likely to cause condensation Very dusty Locations Locations within the reach of Children Locations close to products that emit magnetism If toner is ingested, consult a physician immediately. If toner gets onto your hands or clothing, wash it off immediately with cold water. Washing it off with warm water will set the toner, and make it impossible to remove the toner stains. |
 |
Use only toner cartridges intended for use with this machine. For information on the supported Canon genuine toner, see Replacement Parts. Do not replace toner cartridges until the message prompting you to do so appears. You can replace a toner cartridge while the machine is printing. The color of the toner to be replaced is displayed on the touch panel display. If multiple toner cartridges must be replaced, replace the toner cartridges in the following order:Black, Yellow, Magenta, Cyan. If you continue printing in black-and-white after cyan, magenta, or yellow toner runs out, do not remove the depleted toner cartridges from the machine. You can display an error message informing the user that the remaining toner is low. For instructions on displaying the remaining toner error message, see <Display Remaining Toner Error Message>. For instructions on deleting the remaining toner error message, see <Delete Remaining Toner Error>. |
 |
Complete instructions on how to replace the toner cartridge can be accessed by pressing <Previous> or <Next> on the touch panel display. If toner runs out during a print job, the remaining prints are made after you replace the toner cartridge. If black toner is left, you can continue printing in black-and-white. However, if a job is interrupted because cyan, magenta, or yellow toner runs out, printing in black-and-white is only possible for functions other than the function being used for the interrupted job. After replacing toner cartridges, if printed colors are different from the colors printed before you replaced the toner cartridges, perform <Auto Adjust Gradation> in <Adjustment/Maintenance> (Settings/Registration). Adjusting Gradation |
1
Press [ ].
].
 ].
]. |
If the Black toner or all of the toners run out, this step is not necessary. |
2
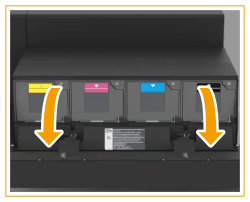
Open the outer toner replacement cover.
 |
The toner cartridge is attached in order of yellow, magenta, cyan, and black from the left. |
3
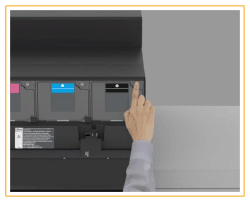
Press the open button of the toner cartridge you want to replace, and then open the inner toner replacement cover.
4
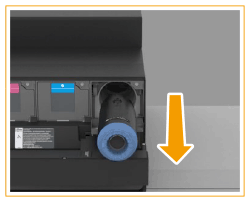
Remove the toner cartridge.
Pull the toner cartridge out halfway, and then remove it completely while supporting it and keeping it straight with your other hand from underneath.
 |
Do not touch the tip of the toner cartridge or subject it to shock by hitting it. Doing so may cause the toner cartridge to leak. 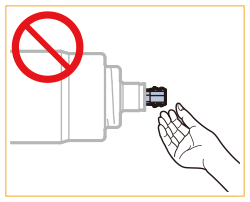 |
5
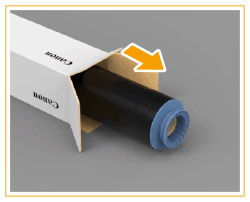
Remove the new toner cartridge from the box.
6
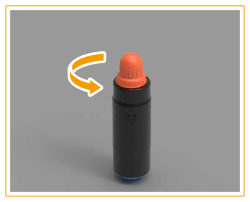
Twist the orange protective cap of the new toner cartridge in the direction of the arrow (counterclockwise) to remove it.
7
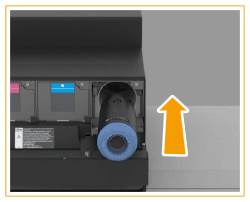
Push the new toner cartridge into the machine as far as it will go.
Support the new toner cartridge with one hand from underneath, while pushing it into the machine with your other hand.
 |
When replacing toner cartridges, make sure that the color of the toner cartridge matches the color of the toner supply port. If the color is different, the toner cartridge will not fit into the port. |
8
Close the inner toner replacement cover.
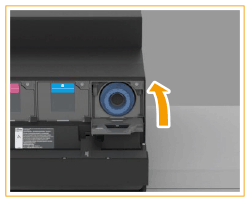
9
Close the outer toner replacement cover.
