Shifting the Image
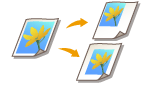 | This function enables you to print with the entire image shifted towards an edge or the center of the page. Shift the image when you want to make blank space on the page to input or arrange text and images on material. |
Specifying Moving Distance
If no blank space exists because the original image and the output paper are the same size, or if you want to shift images by a few millimeters, specify the moving distance.
1
Press <Access Stored Files>. <Home> Screen
2
Select a mail box, select a file you want to print and press <Print>.
3
Press <Change Print Settings>, <Options> and <Shift>.
4
Specify the moving distance.
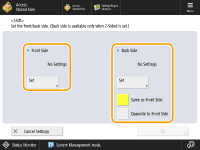
Press <Set> in <Front Side> and specify the moving distance. Press the up/down/left/right buttons indicating directions and enter the moving distance using the numeric keys.
If you want to move the image on the back side when printing both sides, the <Back Side> setting is needed. To move to the same position as the front side, press <Same as Front Side>. To move symmetrically, press <Opposite to Front Side>. To move to a position different from the front side, press <Set> and enter the moving distance.
5
Press <OK>  <Close>.
6
Press <Start Printing>.
Printing starts.