
Paper Jams in the Feeding Unit
This section describes how to clear a paper jam which occurs in the feeding unit. Check the paper jam location on the screen, and follow the procedure below to remove the paper.
The location of the feeding unit is indicated in the following illustration.

 |
When opening and closing each guide or cover, be careful not to get your fingers caught in the gap. |
 |
The following illustration indicates the location of the paper jam. Please refer to it to remove the jammed paper. 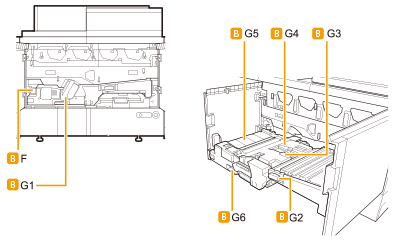 |
1
Open the marking engine front cover in the order of left and right.

2
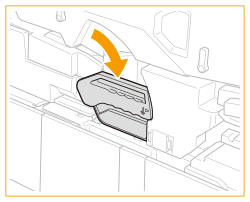
Tilt the lever (G1) to the right.
3
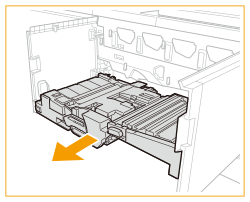
Grip the lever (G1), and pull out the feeding unit.
4
Open the guide (G2).
5
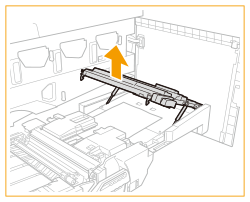
Open the guide (G3), and push the lever to open the guide (G4).
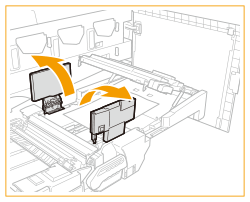
6
Remove any jammed paper.
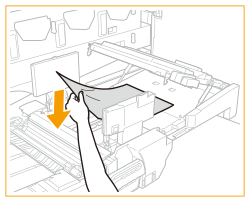
7
Close the guides (G4, G3, and G2).
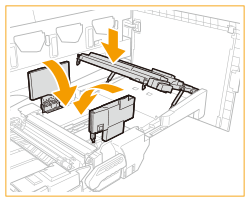
8
Remove any jammed paper from the (G5).
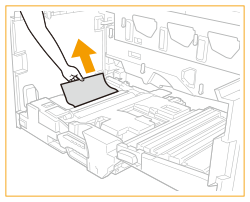
9
Open the guide (G6).
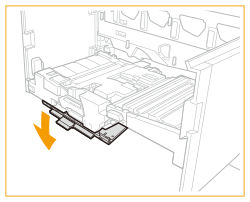
10
Remove any jammed paper.
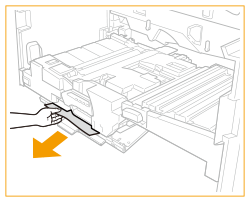
11
Close the guide (G6).
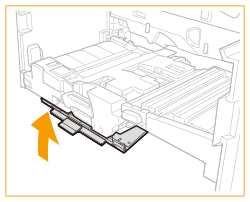
12
Close the feeding unit.
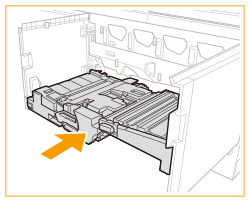
 |
Make sure that the feeding unit is returned to its original position properly. |
13
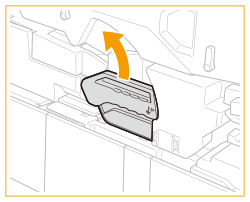
Return the lever (G1) to its original position.
14
Close the marking engine front cover in the order of right and left.
Continue following the instructions on the screen to proceed with the interrupted operation or continue clearing paper jams.