Configuring Integrated Windows Authentication
The Web browser and this software must be configured in order to log in to this software with Integrated Windows Authentication.
NOTE |
For details on enabling Integrated Windows Authenticaiton, see the following. Instruction manual of the Web browser |
Configuring This Software
1.
Log in to this software as the system manager.
2.
Select the [System] menu > [Preferences].
3.
In the drop-down list on the top of the [Preferences] page, select [LDAP Server Settings].
To encrypt the communication with the domain controller of Active Directory, select [Use TLS].
4.
Select [Enable Integrated Windows Authentication].
5.
In [Role Settings], enter the LDAP group name to associate with the roles of this software.
To associate multiple groups with a single role, enter the group names separated by a comma.
NOTE |
Integrated Windows Authentication cannot be used to log in unless a group name to associate has been entered. |
6.
Click [Save].
Configuring the Web Browser
For a Web browser other than Firefox
This section describes the procedure for using one of the following Web browsers to log in to this software.
Edge
Chrome
1.
Log on to the computer as a user with administrator privileges.
2.
Select [Internet Options] in [Control Panel].
3.
Click the [Security] tab.
4.
Click [Local intranet], and click [Custom Level].
5.
Enable [Automatic logon only in Intranet zone], and click [OK].
6.
Click [Site].
7.
Click [Advanced].
8.
Enter the following URL in [Add this website to the zone], and click [Add].
For the server computer where the Manager is installed:
https://localhost:<port number>/
For a client computer:
<FQDN or IP address of computer where Manager is installed>:<port number>/
9.
Click [Close].
10.
Click [OK].
11.
Click [OK].
For Firefox
1.
Log on to the computer as a user with administrator privileges.
2.
Start Firefox.
3.
Access the following URL.
about:config
4.
Search for 'network.negotiate-auth.trusted-uris', and double-click the search result.
5.
Enter the following URL, and click the icon.
For the server computer where the Manager is installed:
https://localhost:<port number>/
For a client computer:
<FQDN or IP address of computer where Manager is installed>:<port number>/
6.
Search for 'network.negotiate-auth.delegation-uris', and double-click the search result.
7.
Enter the following URL, and click the icon.
For the server computer where the Manager is installed:
https://localhost:<port number>/
For a client computer:
<FQDN or IP address of computer where Manager is installed>:<port number>/
8.
Restart Firefox.
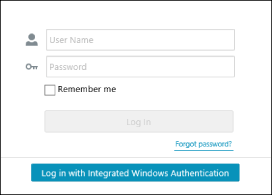
Logging In to This Software with Integrated Windows Authentication
1.
Enter the following URL in the web browser to access this software.
For the server computer where the Manager is installed:
https://localhost:<port number>/
For a client computer:
https://<FQDN or IP address of computer where Manager is installed>:<port number>/
For details on the operating procedure when a security warning is displayed in the web browser, see the following.
NOTE |
The port number can be omitted if the default port number (80 for HTTP, 443 for HTTPS) has not been changed. |
2.
On the login screen, click [Log in with Integrated Windows Authentication].