
Paper Jams inside the Machine and in a Paper Source
Remove the jammed paper from the location where it occurred. If the paper tears, be sure to remove the parts so that no pieces remain.
1
Remove the jammed paper from the output tray.
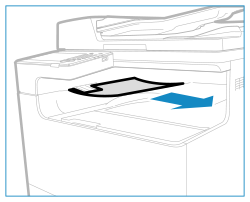
If paper is jammed, gently pull it out in the direction of the arrow.
2
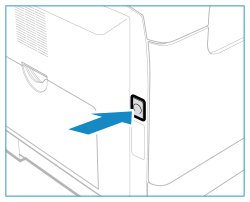
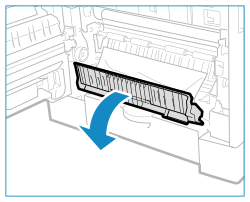
Press the button on the cover on the left side of the main unit, and open the cover on the left side of the main unit.

3
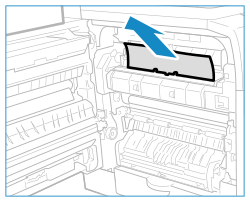
Remove the jammed paper.
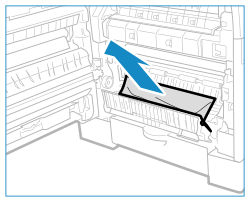
4
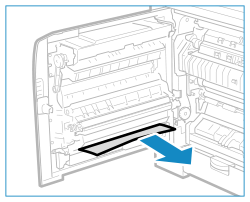
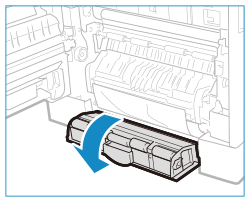
Remove any jammed paper that is protruding from the upper and lower parts of the duplex unit.
5
Open the cover on the left side of paper drawer 1.
6
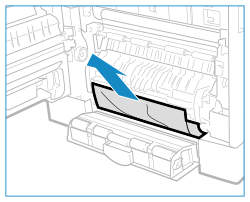
Remove the jammed paper.
7
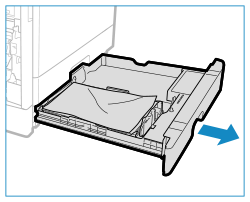
Hold the handle of the paper drawer 1 and pull it out until it stops.
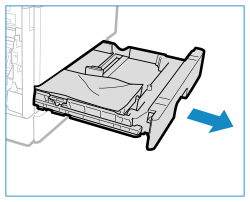
8
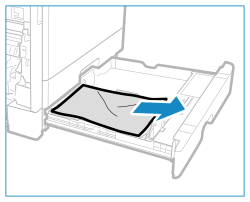
Remove the jammed paper.
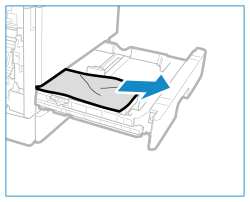
9
Gently insert the paper drawer 1 into the machine.
10
Close the cover on the left side of paper drawer 1.
11
Open the cover on the left side of paper drawer 2.
12
Remove the jammed paper.
13
Hold the handle of the paper drawer 2 and pull it out until it stops.
14
Remove the jammed paper.
15
Gently insert the paper drawer 2 into the machine.
16
Close the cover on the left side of paper drawer 2.
17
Place your hand where the hand symbol is located on the cover on the left side of the main unit, and then gently close the cover on the left side of the main unit until it clicks into place in the closed position.
The message [Paper jammed.] disappears, and printing resumes automatically.
If printing does not resume automatically, try printing again.
If printing does not resume automatically, try printing again.
|
If Paper Jams Occur RepeatedlyCheck the status of the machine and paper. Paper Jams That Occur Repeatedly |