
Replacing the Fixing Assembly
When it is time to replace the fixing assembly, a message notifying the user to replace the fixing assembly with a new fixing assembly is displayed. Follow the message to replace the fixing assembly with a new fixing assembly.
|
Note that the fixing assembly is at a high temperature while the machine is in use. Make sure the fixing assembly is completely cool before performing this procedure. |
 |
Replace the fixing assembly after the message notifying the user to replace the fixing assembly is displayed. |
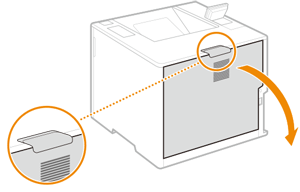
1
Open the rear cover of the main unit.
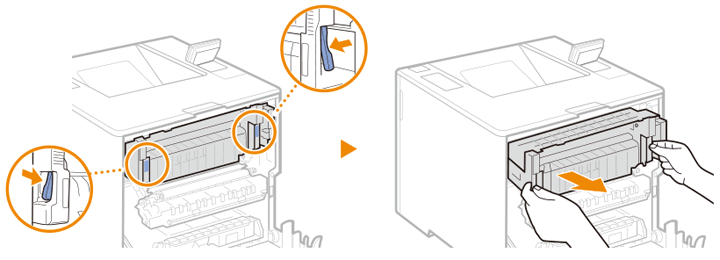
2
Pull the light blue levers of the fixing assembly, and pull the fixing assembly out while slightly lifting it up.
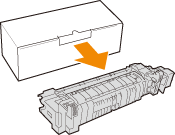
3
Take out the new fixing assembly from its box, and remove the packing materials.
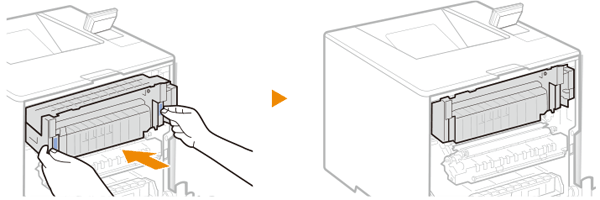
4
Hold the light blue parts of the new fixing assembly, and push it into the main unit horizontally until it clicks into place.
5
Close the rear cover of the main unit.