
Replacing the Feed Roller
The locations of the rollers to replace are indicated below. The rollers are the same for the optional paper feeder and paper deck.
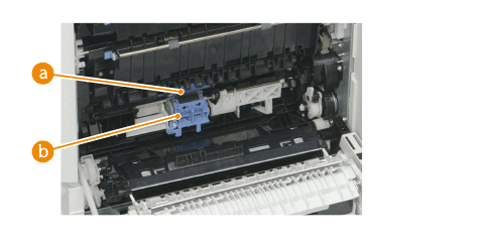
 Upper roller
 Lower roller
 |
Do not touch the rollers of each part with your hands. |
1
Confirm the parts for replacement.

 Lower roller
 Upper roller
 Upper roller tool
 Lower roller tool
2
Open the paper drawer and the covers.
 For the paper drawer of the main unit
1 | Pull out the paper drawer. 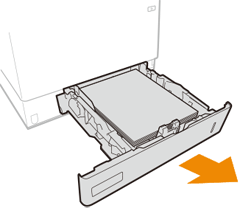 |
2 | Open the rear cover of the main unit. 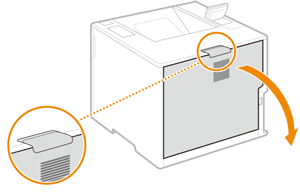 |
3 | Close the transfer roller unit. 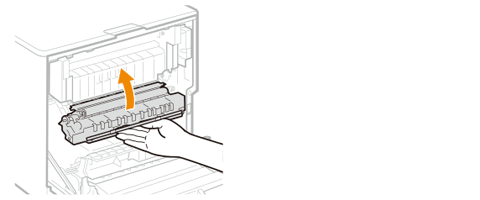 |
4 | Hold the green part, and open the inner cover. 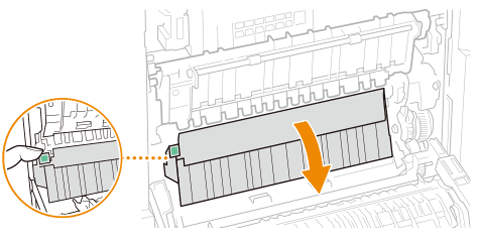 |
 For the optional paper feeder or paper deck
1 | Pull out the paper drawer. 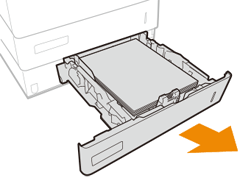 |
2 | Open the rear cover of the paper feeder/the rear cover of paper deck. 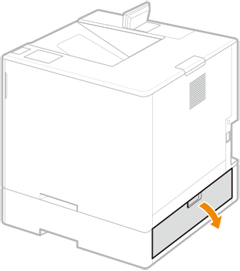 |
3 | Press the green part to release the lock, and open the inner cover. 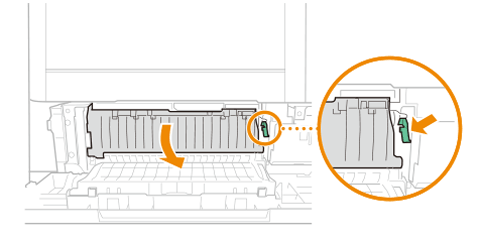 |

Replace the feed rollers in the following order.
 Remove the lower roller.
 Remove the upper roller.
 Attach the upper roller.
 Attach the lower roller.
3
Remove the lower roller.
1 | Take out the lower roller tool from its box. 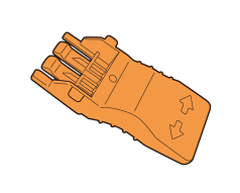 |
2 | Push the lower roller tool into the lower roller until it clicks into place (1), and slide it to the left (2). 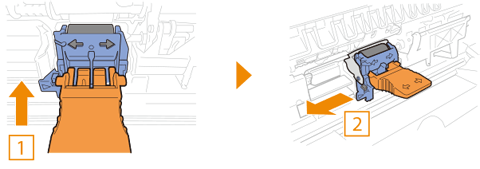 |
3 | Push down the end of the lower roller tool (1), and pull out the lower roller by lifting it upward with the lower roller tool (2).  |
4 | Remove the lower roller tool from the lower roller. The lower roller tool is also used when attaching the new lower roller. 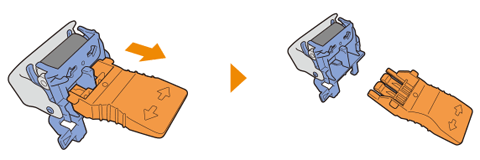 |
4
Remove the upper roller.
1 | Lower the light blue knob. 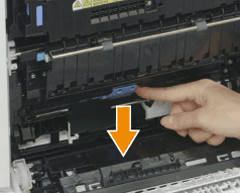 |
2 | Slide the light blue knob to the left until it stops (1), and pull it out to remove the upper roller (2). 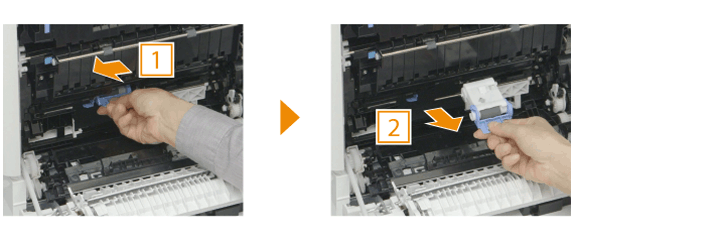  The new upper roller will not fit unless the light blue rod on the left is pushed all the way to the left. If the light blue rod is not pushed all the way to the left, push it to the left, and then attach the upper roller for replacement. 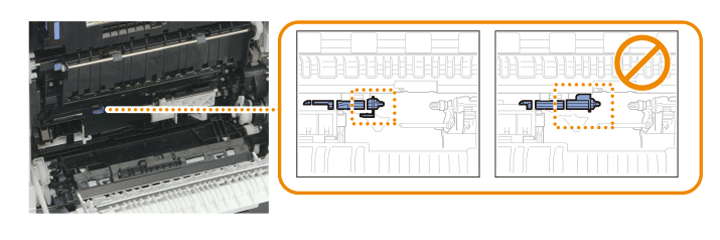 |
5
Attach the upper roller.
1 | Take out the new upper roller for replacement from its box. Do not directly touch the roller with your hands. 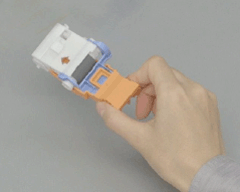 |
2 | With the arrow on the upper roller aligned with the blue mark on the main unit, push the upper roller in to the far side (1), and slide it to the right (2). The upper roller is secured in the next step.  |
3 | Lift up the lever of the light blue rod on the left (1) to secure the upper roller, and then remove the upper roller tool by pulling it out (2).  |
4 | Lift up the light blue knob and push it in until it clicks into place. 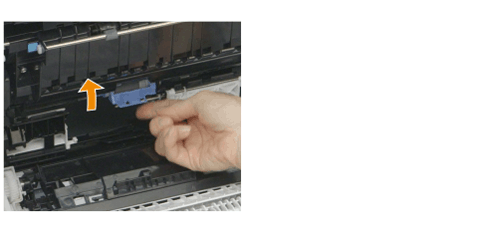  Make sure that the light blue knob is closed. If you close the cover without closing the light blue knob, an error that indicates there is no paper available occurs. After closing the light blue knob, confirm that the upper roller is secured in the appropriate position. If it is not secured correctly, return to step 2 and attach the upper roller again. 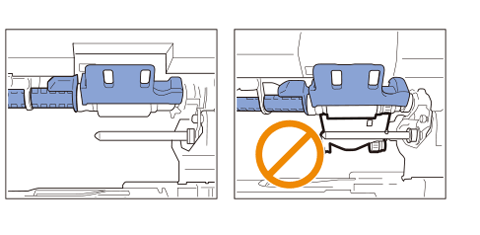 |
6
Attach the lower roller.
1 | Push the lower roller tool into the new roller for replacement until it clicks into place. 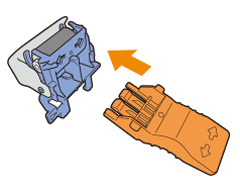 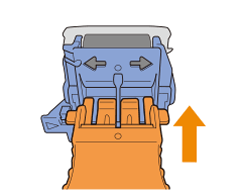 |
2 | Attach the lower roller so that the part (a) of the main unit protrudes from the hole (b) of the lower roller. 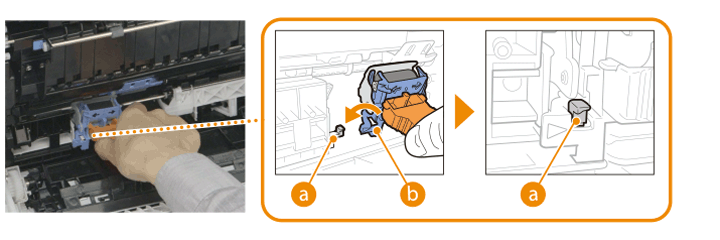 |
3 | Slide the lower roller to the right. 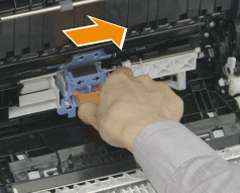  If the roller does not slide, open the paper drawer. |
4 | Remove the lower roller tool. 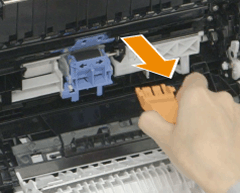 |
7
Close the paper drawer and the covers.
 For the paper drawer of the main unit
1 | Close the inner cover. 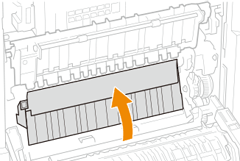 |
2 | Close the rear cover of the main unit. 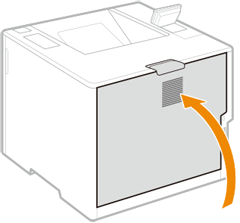 |
3 | Close the paper drawer. 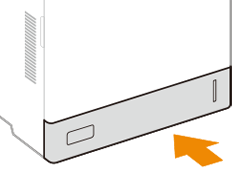 |
 For the optional paper feeder or paper deck
1 | Close the inner cover. 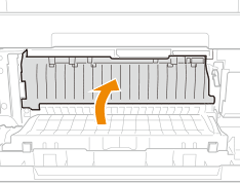 |
2 | Close the rear cover of the paper feeder/the rear cover of paper deck. 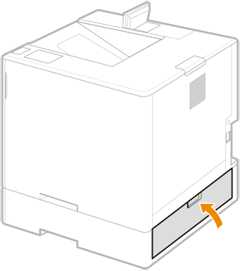 |
3 | Close the paper drawer. 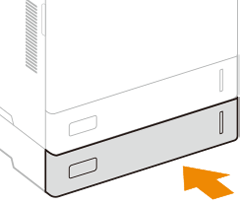 |