 Settings/Registration] on the [Home] screen or other screen. [Load Staples (Staples)]
Adding Staples to the Inner Finisher
When staples in the inner finisher run out, [ ] is displayed at the bottom right of the screen. In this case, replace the staple case with a new one and add more staples.
You can press [] to display a step-by-step video of how to replace the staple case.
] is displayed at the bottom right of the screen. In this case, replace the staple case with a new one and add more staples.You can press [
] to display a step-by-step video of how to replace the staple case.* You can play the replacement procedure video at any time by pressing [ Settings/Registration] on the [Home] screen or other screen. [Load Staples (Staples)]
Settings/Registration] on the [Home] screen or other screen. [Load Staples (Staples)]1
Open the left cover of the finisher.
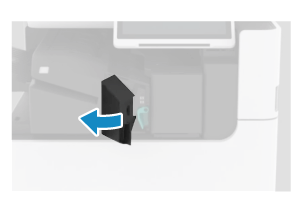
2
Remove the staple cartridge.
Lower the part of the staple cartridge with the green mark to unlock it, and pull it straight out.
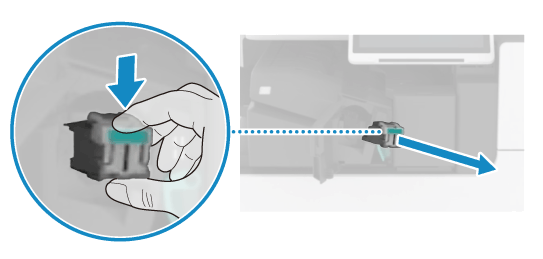
3
Remove the staple case from the staple cartridge.
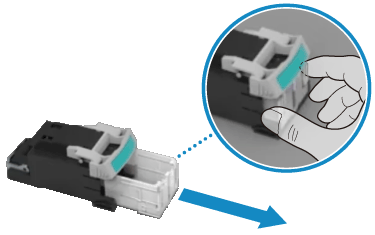
Hold the tabs on both sides of the staple case, release the lock, and remove the staple case in the direction of the arrow shown above.
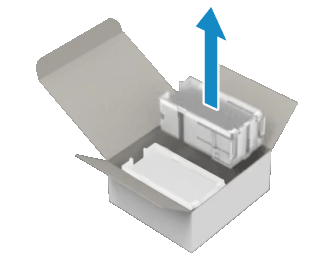
4
Remove a new staple case from the box.
5
Load the new staple case in the staple cartridge.
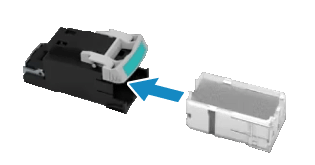
Insert the front end of the staple case into the staple cartridge, and gently push in the staple case until you hear a click.
6
Install the staple cartridge into the finisher.
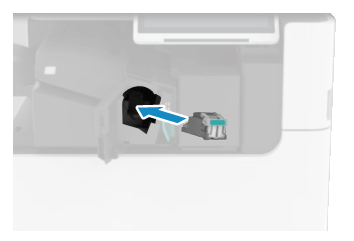
Hold the staple cartridge so that the part with the green mark is facing toward you, firmly push in the staple cartridge as far as it will go, and raise the part with the green mark to lock it.
7
Close the left cover of the finisher.
NOTE
Dry stapling may be performed automatically to reposition the staples after you replace the staple case.