Paper Jams inside the Machine or in the Fixing Assembly
Check the paper jam location on the screen, and follow the procedure below to remove the paper.
 |
Confirm before handlingBefore starting the operation to clear paper jams, confirm that the covers and paper drawers of the machine and optional equipment are closed. |
1
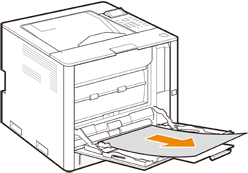
Gently pull out the paper from the multi-purpose tray.

2
Close the multi-purpose tray.

3
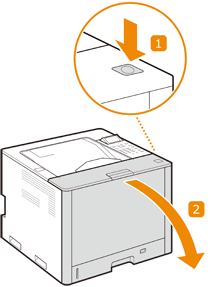
Open the front cover while holding down the button.

4
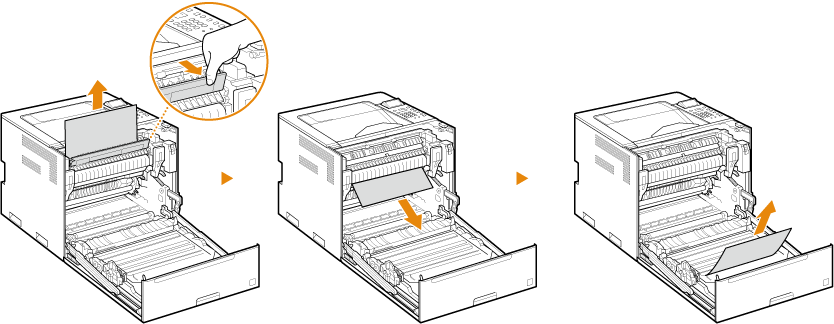
Gently pull out the paper.
If it is difficult to remove paper jammed in the fixing assembly, open the top guide of the fixing assembly.
Remove any paper jammed in the area around the fixing assembly and the paper outlet to the output tray.
Remove any paper jammed in the registration area or duplexing area.

 |
Do not lift up the fixing assembly lever when pulling out the jammed paper. Doing so may cause the fixing assembly to fall. |
5
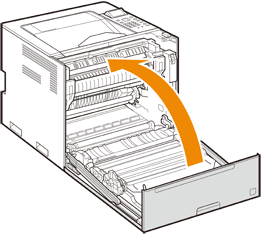
Close the front cover.


When the message is still displayed
Paper may be jammed in other locations. Check other locations, and remove jammed paper if any. If the message is still displayed, check whether the front cover is securely closed.