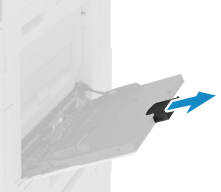
Loading Paper in the Multi-purpose Tray
To temporarily use paper not loaded in the paper drawer, load it in the multi-purpose tray.
You can load paper correctly by aligning the paper guides on the multi-purpose tray with the paper.
When using envelopes or paper with logos, be careful of the orientation of the loaded paper and which side is face up.
You can load paper correctly by aligning the paper guides on the multi-purpose tray with the paper.
When using envelopes or paper with logos, be careful of the orientation of the loaded paper and which side is face up.
1
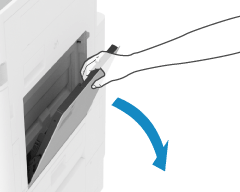
Open the multi-purpose tray.
2
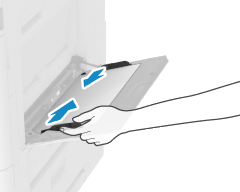
Slide the paper guides to the outside.
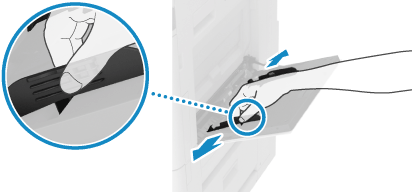
Set the width of the paper guides slightly wider than the width of the paper.
3
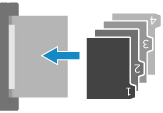
Fan the paper and align the edges.
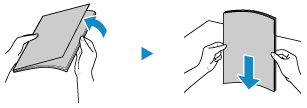
Fan the paper thoroughly in both directions, and align the edges on a flat surface.
When you use transparencies or Coated paper, separate each sheet completely so that none of them are stuck together.
4
Load the paper with the print side face down.
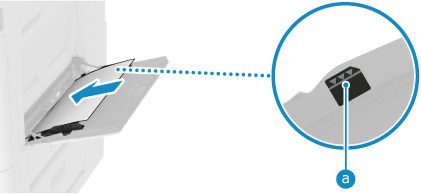
Insert the paper until the edge of the paper is against the paper tray.
Make sure the loaded paper does not exceed the load limit line ( ). If it exceeds the load limit line, there may be misfeeds or a paper jam.
). If it exceeds the load limit line, there may be misfeeds or a paper jam.When Loading Large Size Paper
Pull out the tray extension before loading the paper so as to prevent the paper from drooping.
When Loading Tab Paper
Load the Tab paper turned over in the reverse order with the tab facing away from the paper feed direction.
When Printing on the Back Side of Printed Paper (Manual 2-sided Printing)
Flatten the edge of the paper to remove any curls, and load the paper with the back (unprinted) side face down.
You can use only paper printed with this machine.
You cannot print on a side that has been previously printed on.
On the screen for setting the paper type, select [2nd Side of 2-Sided Page]. Setting the Paper Size and Type for the Multi-purpose Tray
5
Align the paper guides with the length of the paper.
Paper guides that are aligned and are too loose or too tight can cause misfeeds or a paper jam.
6
Set the paper size and type. Setting the Paper Size and Type for the Multi-purpose Tray
By default, when the machine detects paper loaded in the multi-purpose tray, the screen for setting the paper is displayed on the control panel. Set the paper size and type each time you load paper.