
Paper Jams inside the Machine or in the Back Side
Check the paper jam location on the screen, and follow the procedure below to remove the paper.
|
Confirm before handlingBefore starting the operation to clear paper jams, confirm that the covers and paper drawers of the machine and optional equipment are closed. |
1
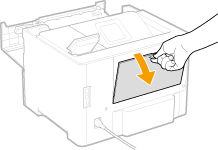
Press the button to open the Front cover.
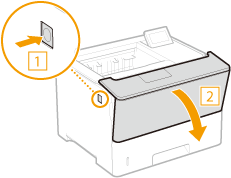
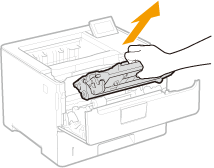
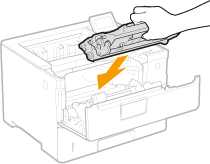
2
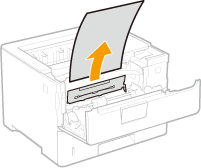
Remove the toner cartridge.
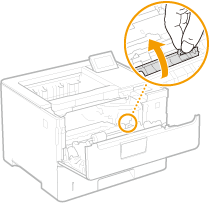
3
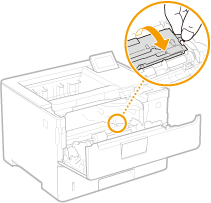
Hold the front side green knob and lift the transport guide.
Keep holding the transport guide until returning it to the original position in step 5.
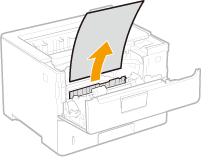
4
Gently pull out the paper.
5
Gently return the transport guide back in place.
6
Hold the rear side green knob and lift the transport guide.
Keep holding the transport guide until returning it to the original position in step 8.
7
Gently pull out the paper.
Pull out the paper flatly as much as possible to prevent unfixed toner from being dropped.
8
Gently return the transport guide back in place.
9
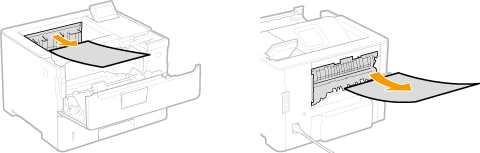
Open the rear cover.
10
Gently pull out the paper.
Determine in which way you can pull out the jammed paper more easily, and try that way first.
Pull out the paper flatly as much as possible to prevent unfixed toner from being dropped.
11
Close the rear cover.
12
Install the toner cartridge.
Make sure to push in the cartridge until it stops.
13
Close the front cover.

When the message is still displayed
Paper may be jammed in other locations. Check other locations, and remove jammed paper if any. If the message is still displayed, check whether the front cover is securely closed.