Adjusting the Print Position
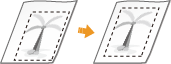
If a document is printed off-center or out of the printable range, adjust the print position. You can adjust the print position for each paper source.
1
Press  (Settings/Register)
  <Adjustment/Maintenance> <Adjust Image Quality> <Adjust Image Position for Each Paper Drawer>.
(Settings/Register) <Adjustment/Maintenance> <Adjust Image Quality> <Adjust Image Position for Each Paper Drawer>.2
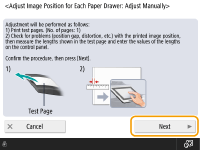
Confirm what is displayed on the screen and press <Next>.
3
Select the paper source that you want to adjust, and press <Start Printing>.
The test page is printed.
4
Follow the on-screen instructions to measure the test page, and enter the measured values.
The front side has "1st side" printed on it, and the back side has "2nd side" printed on it.
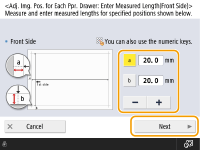
1 | Enter the lengths of <a> and <b> on the front side and press <Next>. |
2 | Enter the lengths of <c> and <d> on the back side and press <OK>. |
5
Press <Start Printing> to print the test page again and check the adjustment results.
To end the adjustment without printing the test page, press <Close>.
6
Press <Done>.
If further adjustment is needed, press <Re-Adjust> and repeat Steps 4 to 7.