Scanning while Removing a Specified Color
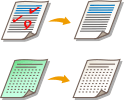 | You can scan an original while removing a specified color. You can scan originals while removing the background color (paper color) or red markings, such as grading marks. |
1
Place the original. Placing Originals
2
Press <Scan and Send>.<Home> Screen
3
Specify the destination on the Scan Basic Features Screen.Scan Basic Features Screen
4
Specify the scan settings as necessary. Basic Operations for Scanning Originals
5
Press <Options>  <Remove Specific Color>.
<Remove Specific Color>.6
Select the color that you want to remove.
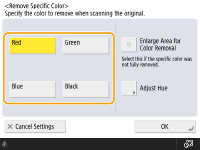
If the specified color is not removed and remains, select <Enlarge Area for Color Removal>.
7
Press <Adjust Hue> to adjust the hue of the color to be removed, if necessary.
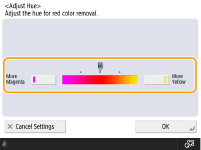
You can adjust the hue when you select <Red>, <Green>, or <Blue>.
8
Press <OK> <Close>.
<Close>.9
Press  (Start).
(Start).The original is scanned and sending or saving starts.