
Paper Jams inside the Machine or in the Fixing Unit
Check the paper jam location on the screen, and follow the procedure below to remove the paper.
|
Confirm before handlingBefore starting the operation to clear paper jams, confirm that the covers and paper drawers of the machine and optional equipment are closed. |
1
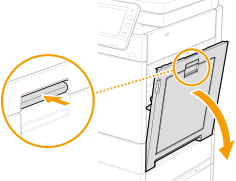
Push the lever and open the right cover of the main unit.
2
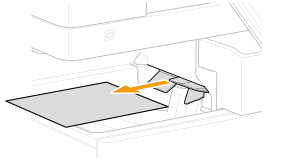
If paper is jammed in the output tray, gently pull it out in the direction of the arrow.
3
Check whether paper is jammed inside the fixing assembly.
1 | Remove the fixing assembly and place it on a flat surface. Hold the light blue part of the fixing assembly with fingers of both hands, and pull it out horizontally. 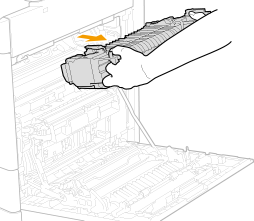 |
2 | If paper is jammed, open the guide (  ) of the fixing assembly and gently pull out the paper in the direction of the arrow. ) of the fixing assembly and gently pull out the paper in the direction of the arrow.If the paper is partly out from the lower side (entry side) of the fixing assembly, gently pull out the paper in the downward direction. 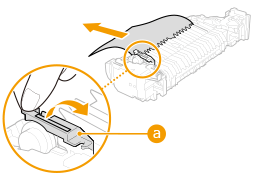 |
3 | Close the guide of the fixing assembly. |
4
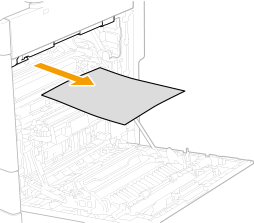
If paper is jammed in the area where the fixing assembly was removed, gently pull it out in the direction of the arrow.
5
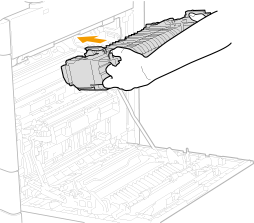
Place the fixing unit back into position.
Hold the light blue part of the fixing assembly with fingers of both hands and push the fixing assembly straight in until you hear a click.
6
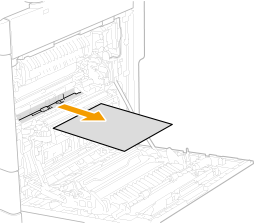
If paper is jammed around the feed roller, gently pull it out in the direction of the arrow.
7
If paper is jammed in the multi-purpose tray paper supply area, gently pull it out in the direction of the arrow.
8
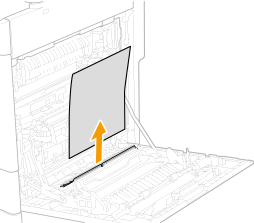
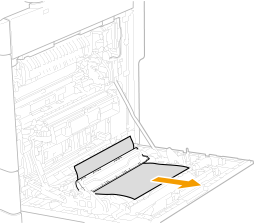
If paper is jammed in the duplex unit, gently pull it out in the direction of the arrow.
9
Close the right cover of the main unit.

When the message is still displayed
Paper may be jammed in other locations. Check other locations, and remove jammed paper if any. If the message is still displayed, check whether the right cover is securely closed.