Print from the Smartphone
You can print files and images saved to the smartphone or cloud storage, or print Web pages displayed in a browser.
 |
Preview |
Print Files and Images
You can select files and images from the following document data sources.
Documents*1 / Photos*1 / Cloud Services (Documents)*2 / Cloud Services (Photos)*2
*1 Accesses data on the smartphone.
*2 Not supported with ChromeOS.
Procedures
1. In the menu area of the home screen, tap [Document Print].
2. Tap the source of the document data.
To use data on a cloud service, also select the type of cloud service.
3. Select the file to print → tap [Select].
You can select multiple photos or multiple JPEG/PNG format files in [Documents]. To select multiple files, repeat the above operations.
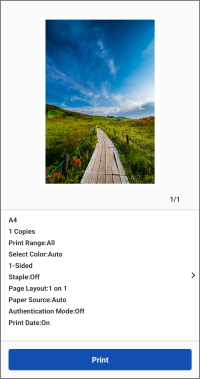
4. On the [Preview] screen, check the preview and print settings.
You can tap the preview image to enlarge the view or delete unnecessary pages.
If a thumbnail image is not displayed, you can tap [Preview] to create a preview.
For information on changing the print settings or fixing layout problems, see the following.
5. Tap [Print].
Other Print Methods
Limitations for Printable Files
Maximum Printable File Size
The maximum printable file size is approximately 10 MB.
 NOTE
NOTEDepending on the content of the data, you may not be able to print files smaller than the above size, such as images with an extremely large number of pixels.
Number of Printable Files or Pages 
Image files: 20 files
PDF files: 99 pages (no limit when using PDF direct printing)
Microsoft Office files: 99 pages
NOTEThe above limitations also apply when printing multiple pages on a single sheet of paper.
Print a Web Page
1. Display the Web page to print in a browser → launch this app from the share menu.
2. If the message "Do you want to use the following printer?" is displayed, confirm the printer to use for printing → tap [Next].
3. Display the preview screen.
For Android
(1) Tap [Next] on the [Preview (Web)] screen.
(2) On the displayed screen, specify the range to print → tap [OK].
For iOS
(1) Tap [Preview].
4. On the [Preview] screen, check the preview and print settings.
You can tap the preview image to enlarge the view or delete unnecessary pages.
If a thumbnail image is not displayed, you can tap [Preview] to create a preview.
For information on changing the print settings or fixing layout problems, see the following.
5. Tap [Print].
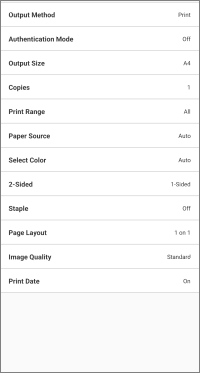
On the [Preview] screen, tap [>] next to the print settings.
On the [Print Settings] screen displayed, change the settings and print.
 |
Print Settings |
Print with a PIN
1. On the [Print Settings] screen, select [Output Method] > [Secure Print] → tap the details button.
2. Set the PIN in [PIN].
Change the document name in [Document Name] as required.
If you enable [Confirm User Information When Performing Secure Print], you can confirm or change the settings when performing secure printing.
3. Return to the preview screen → tap [Secure Print].
A secure print job is saved to the printer.
To print the job, enter the user name and PIN on the control panel of the printer.
Store Print Data in an Inbox in a Printer
1. On the [Print Settings] screen, select [Output Method] > [Store] → tap the details button.
2. Tap [Mail Box] → select the destination inbox number.
Change the document name in [Document Name] as required.
3. Return to the preview screen → tap [Store].
Print Using the Department ID Management Function or User Authentication Function
1. On the [Print Settings] screen, tap [Authentication Mode].
2. Select [Dept. ID Mgt.] or [User Authentication] → tap the details button.
3. Enter the authentication information registered in the printer.
4. Return to the preview screen → tap [Print].
NOTEFor printers that do not support the function, normal printing is executed, even if the above procedure is performed.
If layout problems occur with the following files, you may be able to use the Data Conversion Service to correct the layout.
PDF files
Microsoft Office files
The Data Conversion Service is a free service that performs layout correction by communicating with a server on the Internet to process rendering.
NOTEWhen using the service for the first time, you must agree to the displayed user agreement.
For Excel files, all sheets are printed. If you want to print only some sheets, delete the unnecessary sheets on the [Preview] screen after data conversion.
Correct the Layout with the Data Conversion Service
PDF Files
1. Confirm that the smartphone is connected to the Internet.
To connect to the Internet via a proxy server, configure the proxy settings in the following item.
Home screen > [ ] (Menu) > [App Settings] > [Proxy Settings]
] (Menu) > [App Settings] > [Proxy Settings]2. On the [Preview] screen for printing, tap [>] next to the print settings.
Change the print settings as required.
3. Enable [PDF Preview Method] > [Data Conversion Service].
Microsoft Office Files
1. Confirm that the smartphone is connected to the Internet.
2. Display the [Preview] screen for printing.
Change the print settings as required.
3. On the [Preview] screen, tap [Image Correction].
Limitations for Correcting the Layout with the Data Conversion Service
You can correct the layout of files of up to 20 MB.
You cannot download files of more than 99 pages after data conversion.
You cannot convert the following files.
Files with a password
Files with invalid or corrupt data
Empty files
This service may be temporarily unavailable due to maintenance.
You can check maintenance information in the following item.
Home screen > [] (Menu) > [About] > [Maintenance]
] (Menu) > [About] > [Maintenance]Uploading and downloading data may take several minutes, depending on the content of the data to be printed and the communication environment you are using.
The layout may not be exactly the same as the original.
Print Documents Captured with a Smartphone Camera
1. In the menu area of the home screen, tap [Smartphone Copy].
2. Capture an image of the document with the smartphone → check the image → tap [Next].
If the image is distorted or has color problems, perform correction in [Correct Distortion (Trapezoid)] or on the [Image Processing Mode] screen.
3. Check the print settings.
To change the print settings, tap [Change settings].
4. Tap [Print].
NOTEYou can use the following setting to specify the destination folder for saving the captured image.
Home screen > [] (Menu) > [App Settings] > [Save Folder Name]
] (Menu) > [App Settings] > [Save Folder Name]Conditions for Directly Sending PDF Files to the Printer for Printing
If the following conditions are met, you can follow the regular printing procedure to directly send PDF files to the printer for printing.
The printer you are using supports PDF direct printing
If the printer supports PDF direct printing, [ ] is displayed on the [Printer Details] screen of the printer registered to this app.
] is displayed on the [Printer Details] screen of the printer registered to this app.[PDF Direct Print] is enabled in this app
Configure the following setting for the printer registered to this app.
[Printer Details] screen > [Printer Settings] > [Print Options] > [PDF Direct Print]
Limitations for Directly Sending PDF Files to the Printer for Printing
Margins are always set to the minimum regardless of the [Minimize Margins and Print] setting on the [Print Settings] screen.
The displayed print preview and the actual print result may differ.
To specify the pages to print, do so in [Print Range] on the [Print Settings] screen. Pages cannot be deleted on the zoomed preview screen.
When printing a PDF file with a password on a printer which does not support the printing of PDF files with a password, [PDF Direct Print] must be disabled.
If you attempt to print with it enabled, the job will be canceled by the printer. If that happens, the smartphone and this app will not be notified.