82JS-00E
Scanning and Saving to a Computer
How to save scanned data to a computer operating the machine is described here.
1
Place the original in the feeder or on the platen glass.
2
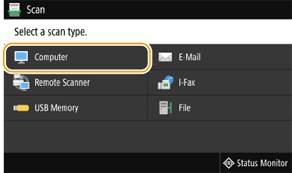
Select <Scan> in the Home screen.
If a login screen appears,
Authenticated transmission is set on the machine. Follow the steps below to log in.
1
Enter your user name.
2
Enter the password.
3
Select the authentication server.
4
Select <Log In>.
3
Select <Computer>.
If you are using only a computer that is connected to the machine by USB, go to step 5.
4
Select the computer where you want to save the scanned original.
In the computer name list, select the computer to which you want to save the scanned original.
5
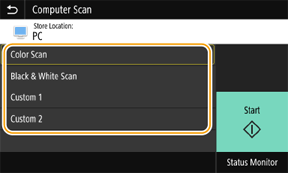
Select the scan type.
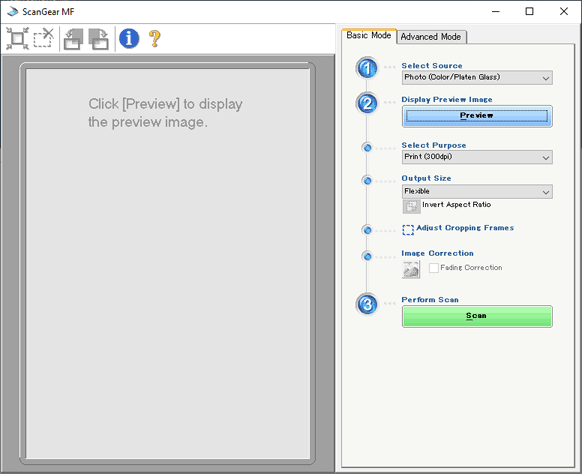
You can use MF Scan Utility to check or change the set scan type. Setting the File Format and Original Orientation for Scanning (MF Scan Utility)
6
Select <Start>.
By default, the scan data is saved in the [Document] folder. A subfolder with the date in its folder name is created and the data is saved in it.
You can change the save folder in MF Scan Utility. Setting the File Format and Original Orientation for Scanning (MF Scan Utility)
If the original is placed in the feeder
After the original is scanned, the data is sent to the specified computer.
If the original is placed on the platen glass
1
After the original is scanned, select <Finish>.
The data is sent to the specified computer.
If there are multiple originals,
1
After one original is scanned, place the next original.
2
Select <Scan Next>.
3
Repeat steps 1 to 2 until all originals have been scanned.
4
Select <Finish>.
Data is sent to the specified computer.
If scanning is not possible,
Scanning is not possible if ScanGear MF is displayed on the computer where the scan data is to be saved. Close the screen before scanning.