82JU-00S
Setting Access Restrictions for a Shared Folder (Remote UI)
Allow only set users to scan and send data to a shared folder.
Perform step 1 to step 2.
This section uses Windows 10 as an example.
To check steps starting with how to set a shared folder, see the following.
Step 1 Checking the computer's login user name and password
1
In Windows, select [ Start]
  [
[ Settings].
Start] Settings].2
Click [Accounts].
3
Check the displayed [Your info] and write it down.
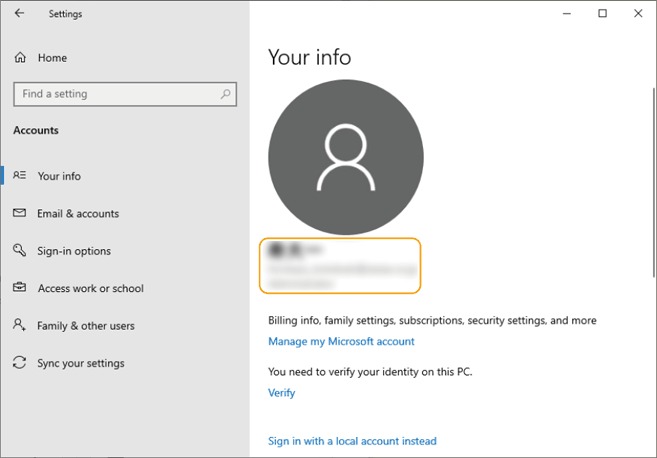
Also check the login user password.
Step 2 Setting access restrictions for destinations
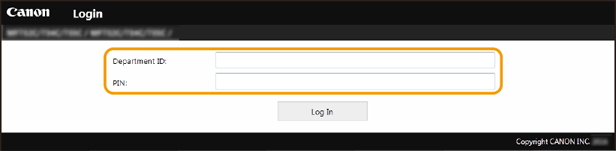
1
Start the web browser.
2
Enter "http://<the IP address of the machine>/" in the address field, and press the [ENTER] key on the keyboard.
If you are using an IPv6 address, enclose the IPv6 address with brackets (e.g. "http://[fe80:2e9e:fcff:fe4e:dbce]/").

3
Select [System Manager Mode], enter the [System Manager ID] and [System Manager PIN], and then click [Log In].
If a remote UI access PIN is set, enter the number. Contact your administrator for details.
If Department ID Management is set,
Enter the registered [Department ID] and [PIN], and then click [Log In].
4
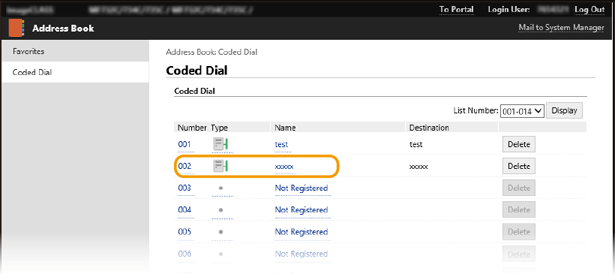
Click [Address Book].
If a screen appears for entering a PIN for the address book,
1
Enter the PIN.
2
Click [OK].
5
Click [Coded Dial].
6
Click [Number], [Type], or [Name] of the destination for which you want to set an access restriction.
7
Click [Edit].
8
Enter your user name and password.
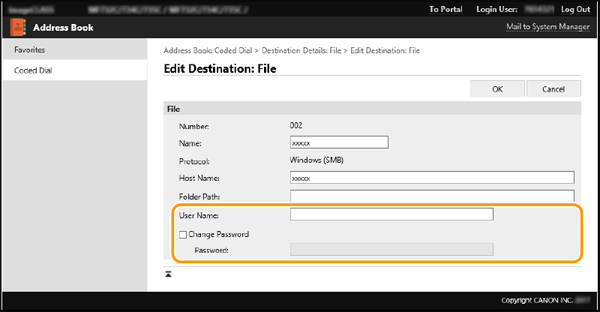
[User Name]
Enter the user name you checked in step 1.
[Set Password]
Select the checkbox and then enter the [Password] you checked in step 1.
9
Click [OK].