88W0-02E
How to Remedy Paper Jams (MF543x)
Follow the steps for the location where the paper is jammed to remove the paper.
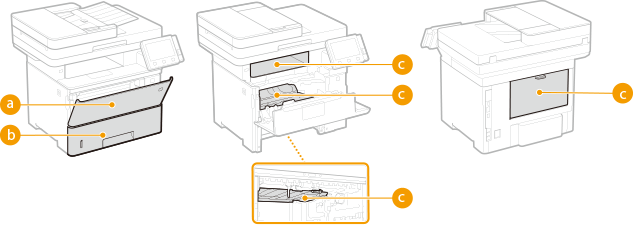
 Multi-purpose tray Paper is jammed in the multi-purpose tray
 Paper drawer Paper is jammed in the paper drawer
 Output tray, inside the machine, duplex transport guide, and at the back Paper is jammed inside the machine
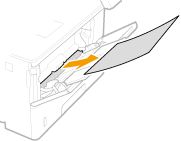
Paper is jammed in the multi-purpose tray
If paper is loaded in the multi-purpose tray, remove it first before working. If the jammed paper cannot be removed easily, do not pull it out forcibly. Go to the next step.
1
Pull out the paper gently.
2
Load the paper.
3
When <Is all of the jammed paper removed?> appears, select <Yes>.
NOTE
If the message does not disappear
Other paper may be jammed. Check another location and remove any jammed paper.
Paper is jammed in the paper drawer
If the jammed paper cannot be removed easily, do not pull it out forcibly. Instead, follow the steps for a different location in the message.
1
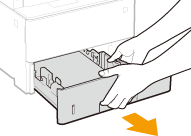
Pull out the paper drawer all the way.
2
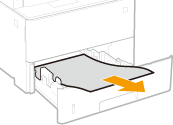
Pull out the paper gently.
If an optional paper feeder is installed, remove the paper in the same way.
3
Insert the paper drawer.
4
When <Is all of the jammed paper removed?> appears, select <Yes>.
NOTE
If the message does not disappear
Other paper may be jammed. Check another location and remove any jammed paper.
Paper is jammed inside the machine
Paper is jammed inside and at the back of the machine
If the jammed paper cannot be removed easily, do not pull it out forcibly. Go to the next step.
1
Open the front cover.
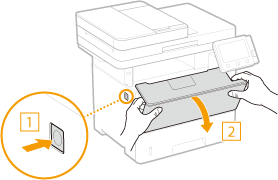
2
Remove the toner cartridge.
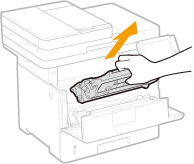
3
Hold and lift the transport guide by the green tab at the front.
Do not let go of the transfer guide until you return it to its original position in step 5.
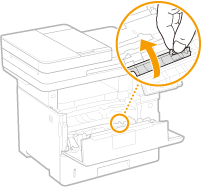
4
Pull out the paper gently.
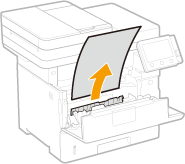
5
Return the transport guide to its original position gently.
6
Hold and lift the transport guide by the green tab at the rear.
Do not let go of the transport guide until you return it to its original position in step 8.
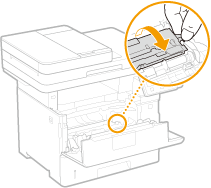
7
Pull out the paper gently.
Pull out the paper as horizontally as possible to avoid spilling unfixed toner.
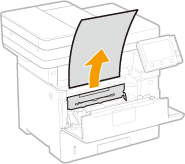
8
Return the transport guide to its original position gently.
9
Open the rear cover.
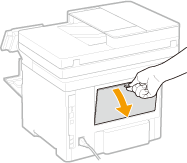
10
Pull out the paper gently.
Pull out the jammed paper in the direction it comes out easiest.
Pull out the paper as horizontally as possible to avoid spilling unfixed toner.
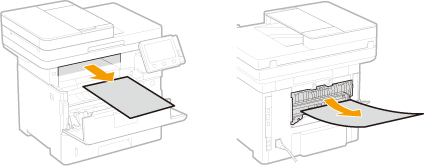
11
Close the rear cover.
12
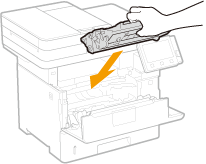
Install the toner cartridge.
Push it in firmly all the way.
13
Close the front cover.
NOTE
If the message does not disappear
Other paper may be jammed. Check another location and remove any jammed paper. If the message still does not disappear, check that the front cover is closed securely.
Paper is jammed in the duplex transport guide
If the jammed paper cannot be removed easily, do not pull it out forcibly. Instead, follow the steps for a different location in the message.
1
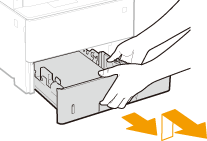
Pull out the paper drawer, and lift up the front to remove it.
2
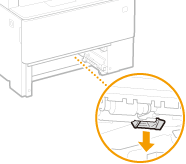
Press the green lever to lower the duplex transport guide.
3
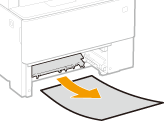
Pull out the paper gently.
4
Replace the duplex transport guide.
Close so it clicks securely.
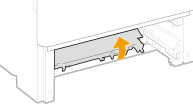
5
Insert the paper drawer into the machine.
6
When <Is all of the jammed paper removed?> appears, select <Yes>.
NOTE
If the message does not disappear
Other paper may be jammed. Check another location and remove any jammed paper.