88W0-031
Replacing the Toner Cartridges
How to replace the toner cartridges is described here.
NOTE
When handling consumables, observe the precautions in the "Getting Started" included with the machine.
MF746Cx / MF645Cx / MF643Cdw / MF641Cw
1
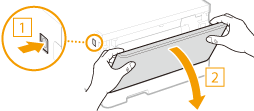
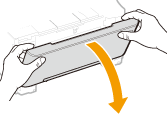
Open the front cover.
MF746Cx
MF645Cx / MF643Cdw / MF641Cw
2
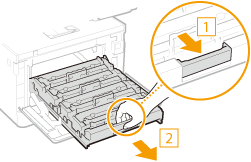
Pull out the toner cartridge tray.
3
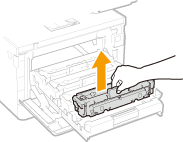
Pull the toner cartridge to be replaced straight up and out.
4
Remove the new toner cartridge from its packaging.
1
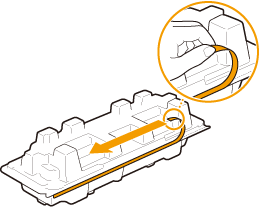
Place the packaging on a flat surface, and pull away the tab.
2
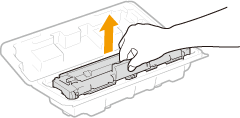
Remove the toner cartridge.
5
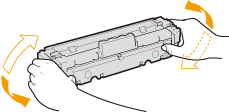
Shake the toner cartridge 5 or 6 times so the toner is even inside.
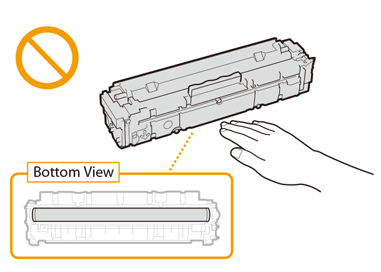
IMPORTANT
Do not touch the drum surface on the bottom of the toner cartridge.
6
Install the toner cartridge.
Install in the slot that has the same-color label ( ) as the toner cartridge.
 ) as the toner cartridge.
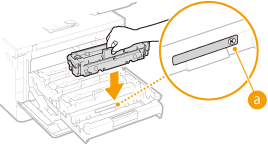
IMPORTANT
The bottom of the toner cartridge is unprotected. Be careful not to hit the frame of the slot when installing the toner cartridge.
7
Push the toner cartridge tray in and close the front cover.
Once the front cover is closed, simple gradation correction starts. Wait for the correction to finish.
MF543x
1
Open the front cover.
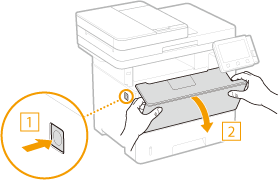
2
Remove the toner cartridge.
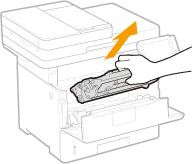
3
Remove the new toner cartridge from its protective case.
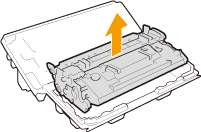
4
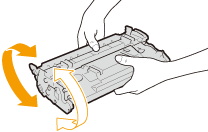
Shake the toner cartridge 5 or 6 times so the toner is even inside.
5
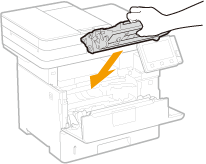
Install the toner cartridge.
Push it in firmly all the way.
6
Close the front cover.
MF449x / MF445dw / MF441dw
1
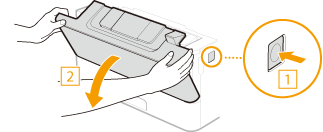
Open the front cover.
2
Remove the toner cartridge.
3
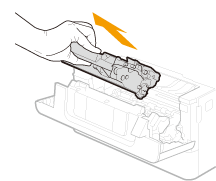
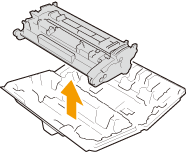
Remove the new toner cartridge from its protective case.
4
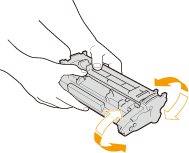
Shake the toner cartridge 5 or 6 times so the toner is even inside.
5
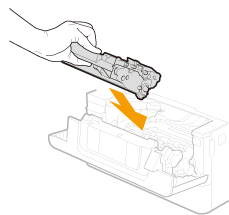
Install the toner cartridge.
Push it in firmly all the way.
6
Close the front cover.