85CR-007
How to Print Clear Photos
If the characteristics of photos, such as the brightness, contrast, color, and sharpness, are different from what you expected, follow the procedure below to print better photos.
1
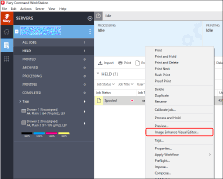
Right-click the job in Command WorkStation on the imagePRESS Server → click [Image Enhance Visual Editor].
NOTE
Depending on the imagePRESS Server you are using, the optional product which enables Image Enhance Visual Editor may be necessary.
If [Image Enhance Visual Editor] is not displayed, see "When Image Enhance Visual Editor Is Unavailable."
NOTE
You can only edit processed jobs.
If you cancel rasterization after editing a job, the edits are canceled.
2
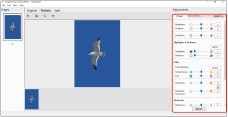
Adjust the values for <Brightness>, <Contrast>, <Definition>, <Highlights & Shadows>, <Color>, <Sharpness>, and <Red-Eye Correction> on the [Image Enhance Visual Editor] screen.
3
Click [File] → [Proof Print] to check the finished result.
If you are satisfied with the result, click [File] → [Save] to save the adjusted values, and then you can print the job.
Reducing Jagged Edges and Emphasizing Edges

If you want to reduce jagged edges and reduce noise, or if you want to emphasize edges and smooth images, try the following procedure to improve the printed image.
1
Double-click the job in Command WorkStation on the imagePRESS Server.
[Job Properties] is displayed.
2
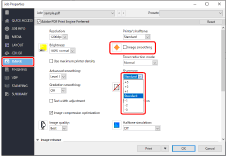
Click the [IMAGE] tab and change the print settings for <Image smoothing> or <Sharpness>, as necessary.
Reducing jagged edges and reducing noise
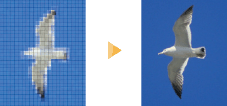
Select the check box for <Image smoothing>.
This function performs complementary processing to smooth low resolution images. The effects of insufficient resolution are reduced by smoothing jagged edges in images with resolutions of less than 150 dpi from sources such as the Internet.
Emphasizing edges and smoothing images
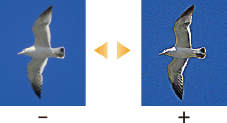
To emphasize edges, select a positive value.
To smooth images, select a negative value.
To smooth images, select a negative value.
3
Click [OK].
Print a test sheet to check the finished result. If you are satisfied with the result, you can print the job.
When Image Enhance Visual Editor is unavailable, you can select [Image Enhance] and adjust the brightness, contrast, color, and sharpness of photos. However, if you make these adjustments, the adjusted values are applied to future jobs as well as the current job. Be sure to restore the settings to their defaults when you finish the job.
1
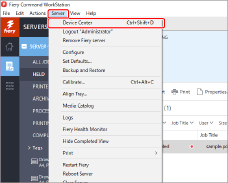
Click [Server] → [Device Center] in Command WorkStation.
2
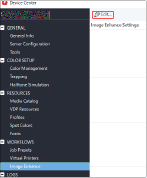
Click [Image Enhance] → [Edit] in the device center screen.
3
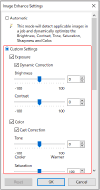
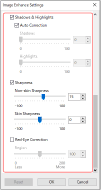
Select <Custom Settings> on the [Image Enhance Settings] screen, and adjust the values for <Exposure>, <Color>, <Shadows & Highlights>, <Sharpness>, and <Red-Eye Correction>.
4
Click [OK] and then close the device center screen.
Print a test sheet to check the finished result. If you are satisfied with the result, you can print the job.
To restore the values to their defaults after printing the job, return to the [Image Enhance Settings] screen, select <Automatic>, and click [OK].
What to Do If, After Printing Large Volumes of Text Documents, Colors in Photos Are Inconsistent

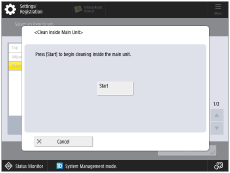
If you clean inside the main unit after printing large volumes of text documents, you can reduce the inconsistency of colors in the photos that you print.
Press  → [Adjustment/Maintenance] → [Maintenance] → [Clean Inside Main Unit].
 → [Adjustment/Maintenance] → [Maintenance] → [Clean Inside Main Unit].
 "Settings/Registration" > "Adjustment/Maintenance" "Maintenance" in the User's Guide