982C-01R
Printing on Envelopes
How to load envelopes correctly and print on them is described here.
Perform step 1 to step 3.
Computer screens or illustrations used in this section are those of MF753Cdw, unless otherwise noted. Depending on the model and operation system you are using, what is described in this section may appear differently.
Step 1 Loading envelopes
Before loading envelopes,

Be sure to prepare the envelopes first such as by removing curls before loading them in order to avoid a paper jam or wrinkles.
1
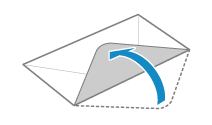
Close the flap of each envelope.
2
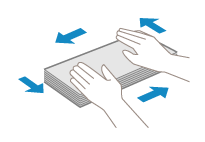
Flatten them to release any remaining air, and make sure that the edges are pressed tightly.
3
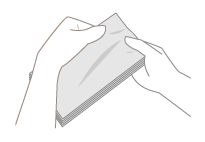
Loosen any stiff corners on the envelopes and flatten any curls.
4
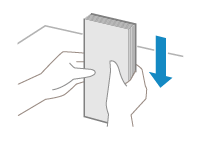
Align the edges of the envelopes on a flat surface.
Loading in the Multi-Purpose Tray (MF753Cdw / MF751Cdw / MF465dw / MF462dw)
1
Close the flaps.

2
Load the envelopes so that the edge with the flap is toward the left side with the front side (printed side) facing up.
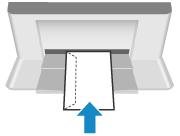
Next, specify the paper size and the paper type. Envelopes loaded in the multi-purpose tray (MF753Cdw / MF751Cdw / MF465dw / MF462dw)
Loading in the paper drawer (MF753Cdw / MF751Cdw / MF275dw / MF273dw / MF272dw)
Load the envelopes so that the edge with the flap is toward the left side with the front side (printed side) facing up.
MF753Cdw / MF751Cdw

MF275dw / MF273dw / MF272dw

Next, specify the paper size and the paper type. Envelopes loaded in the paper drawer (MF753Cdw / MF751Cdw / MF275dw / MF273dw / MF272dw)
Step 2 Specifying the paper size and paper type
Envelopes loaded in the multi-purpose tray (MF753Cdw / MF751Cdw / MF465dw / MF462dw)
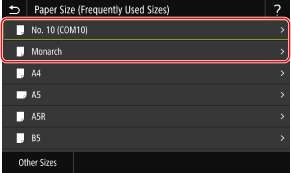
When envelopes are loaded in the multi-purpose tray, the setting screen to select the paper size appears on the display. Follow the steps below to specify the settings.
1
Select the size of the loaded envelopes.
2
Select <Envelope>/<Envelope 1>for the paper type.
On the MF465dw / MF462dw, if you cannot print properly with <Envelope 1>, such as due to the toner coming off, try using <Envelope 2>.
Next, print from a computer. Step 3 Printing from a computer
Envelopes loaded in the paper drawer (MF753Cdw / MF751Cdw / MF275dw / MF273dw / MF272dw)
1
Select <Paper Settings> in the Home screen.
2
Select the paper drawer where the envelopes are loaded.
3
Select the size of the loaded envelopes.
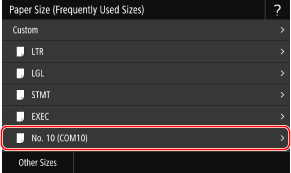
4
Select <Envelope> for the paper type.
Next, print from a computer. Step 3 Printing from a computer
Step 3 Printing from a computer
How to print varies depending on the operating system of the computer you are using. Use the method appropriate for your operating system to print.
Printing from a Windows computer
1
Select [Print] in the application menu.
2
Select the machine in the print window, and click [Preferences], [Printer properties], or [Properties].
3
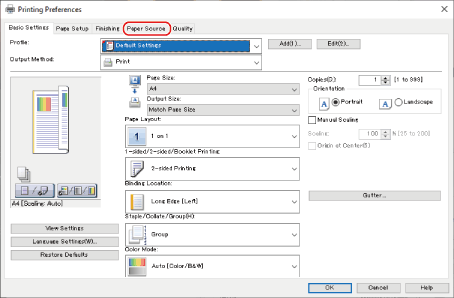
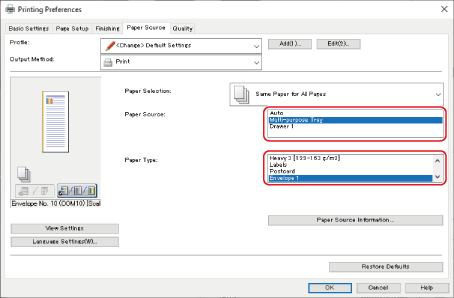
Click [Paper Source] in the print settings window of the printer driver.
4
Select the paper source where the envelopes are loaded in [Paper Source], and select [Envelope] in [Paper Type].
5
Click [OK].
6
Click [Print] or [OK] in the print window.
Printing from a Mac computer
This section uses macOS 10.15 as an example. The screens may differ depending on the versions of the operating system.
1
Select [Print] in the [File] menu of the application.
2
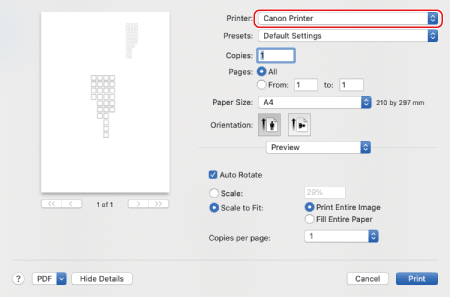
Select the machine in [Printer].
If no print options are displayed, click [Show Details] at the bottom of the dialog box.
3
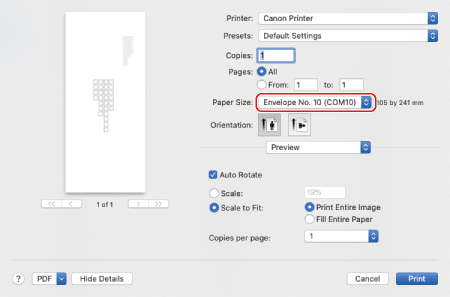
Select the paper size of the loaded envelopes in [Paper Size].
4
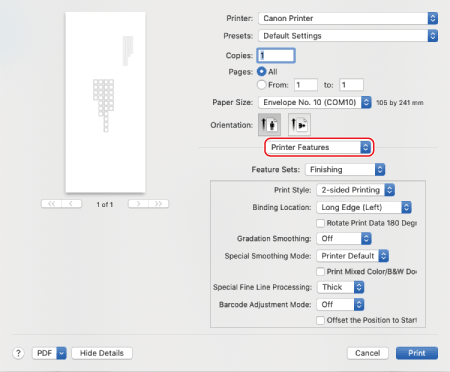
From the print options pop-up menu, select [Printer Features].
5
Select [Paper Source] in [Feature Sets], and then select [Envelope 1] or [Envelope 2] in [Paper Type].
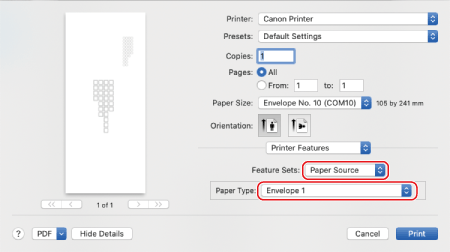
6
Click [Print].