Inserting Image Files
With Desktop Editor, you can insert an image document into a document as an annotation.
1.
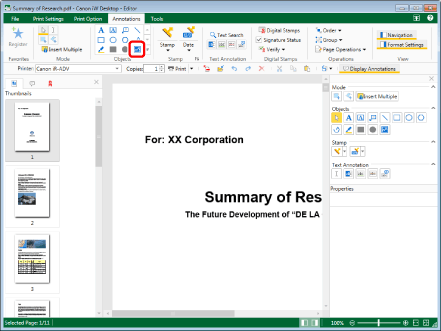
Click  (Insert Image) on the ribbon.
 (Insert Image) on the ribbon.
Or, click  (Insert Image) on the Details Window.

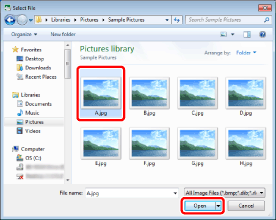
The [Select File] dialog box is displayed.
|
NOTE
|
|
If the Details Window is not displayed, see the following.
This operation can also be performed with the tool buttons on the toolbar. If tool buttons are not displayed on the toolbar of Desktop Editor, see the following to display them.
|
2.
Select the document you wish to insert and click [Open].

3.
Move the mouse pointer to the Work Window.
The shape of the mouse pointer changes to  .
.
|
NOTE
|
|
To cancel the insertion process, do one of the following.
Click
 (Select Object) on the ribbon (Select Object) on the ribbonClick
 (Select Text) on the ribbon (Select Text) on the ribbonClick
 (Grab Mode) on the ribbon (Grab Mode) on the ribbonClick the command selected on the ribbon again
Click
Click
Click
Click the selected button on the Details Window again
Press the [Esc] key on the keyboard
|
4.
Click the position to insert the center of the image.
The image is inserted.
|
NOTE
|
|
Image documents in the following image file formats can be inserted.
BMP
TIFF (For a multi-page TIFF image, the first page is used. TIFF images including transparent parts also can be used.)
JPEG
PNG
GIF
The types of image documents that can be inserted may increase, depending on the codecs installed in your computer.
When the edge of the inserted image exceeds the edge of the page, the size of the image is automatically reduced to fit the page while the aspect ratio of the image is maintained.
It is convenient if you register frequently inserted images as image stamps. For information on registering new image stamps, see the following.
For more information on handling annotations, see the following.
Copying, cutting, and pasting: Copying Annotations
Moving: Moving Annotations
Deleting: Deleting Unnecessary Annotations
Enlarging/reducing: Resizing Annotations
|
5.
Click on the Work Window outside the image you inserted to deselect the image.
|
NOTE
|
|
When you want to change the inserted image, delete it first and then insert another image again.
|