Poster Printing
You can enlarge the print data of one page and print it over multiple sheets of paper. When the output sheets are joined together, they form a large print like a poster.
This topic also introduces poster printing setting and output examples.
To Perform Poster Printing
1.
Display the [Layout] sheet.
2.
Enable [Poster] → specify the number of parts.
If you want to set details such as the range of pages to be printed, printing with border lines, etc., click [Details] and perform the following steps.
3.
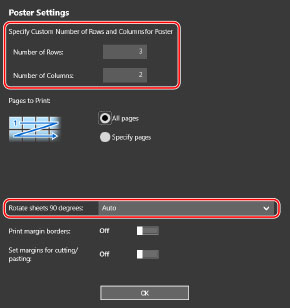
In the [Poster Settings] screen, set any necessary items.
If you have selected [Custom] for the number of divisions, specify the number of vertical and horizontal divisions.
4.
Click [OK].
Poster Printing Setting and Output Examples
This shows combinations of setting examples and output results relating to poster printing. The setting examples are shown in combination with the setting state in the [Poster Settings] screen whenever required.
Setting Example 1.
[Preview] sheet > [Orientation]: [Portrait]
[Layout] sheet > [Poster]: [1 x 2]
Output Result
Setting Example 2.
[Preview] sheet > [Orientation]: [Portrait]
[Layout] sheet > [Poster]: [Custom]
Detailed settings in the [Poster Settings] screen
Output Result
When [Poster Settings] screen > [Rotate sheets 90 degrees] > [On] or [Auto] is selected
If you select [Auto], the pages are oriented in the direction in which the print data is printed larger. In this example, the orientation is the same as when [On] is selected.
When [Poster Settings] screen > [Rotate sheets 90 degrees] > [Off] is selected
Setting Example 3.
[Layout] sheet > [Poster]: [2 x 2]
Detailed settings in the [Poster Settings] screen
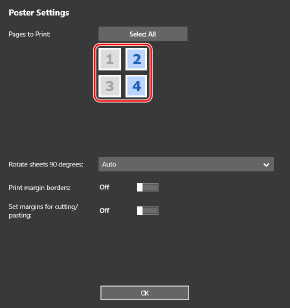
Output Result
Setting Example 4.
[Layout] sheet > [Poster]: [2 x 2]
Detailed settings in the [Poster Settings] screen
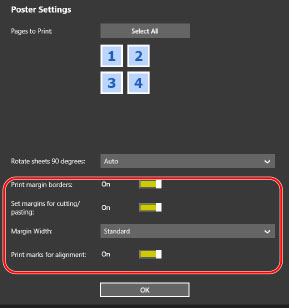
Output Result
Legend
Broken line: border
 : paste mark
 : cut mark
 : Margin Width