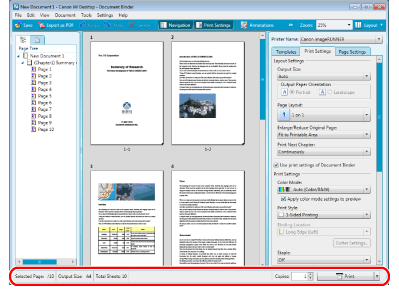
Document Binder Screen Layout
The screen of Document Binder consists of three "bars" and three "panes."
Panes
|
Note
|
|
Items other than the Preview Pane can be shown and hidden with tool buttons. If you hide a pane, the other panes are displayed larger.
You can move the boundary between the Navigation Pane and the Preview Pane by dragging it.
You can resize the Document Binder screen by dragging the four corners of the Document Binder screen.
|
Navigation Pane
Shows a tree diagram of the page configuration of a binder document when the [Page Tree] tab is selected. When the [Original Documents] tab is selected, the original documents before merging (original document names) are displayed. The navigation pane is not displayed by default.
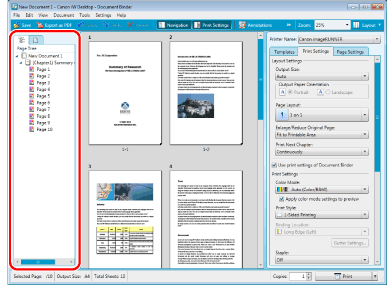
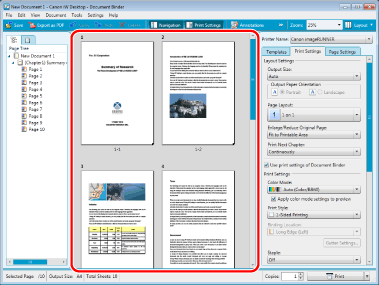
Preview Pane
Displays the document print preview.
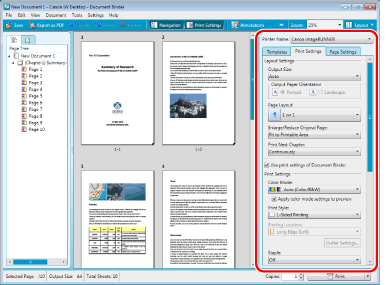
Print Settings Pane
Enables you to select the printer/fax to use for printing/sending. You can also switch tabs to select/register print settings and print templates.
Bars
Areas of the Document Binder screen with items for handling documents, starting other modules, and printing/sending faxes are called "bars."
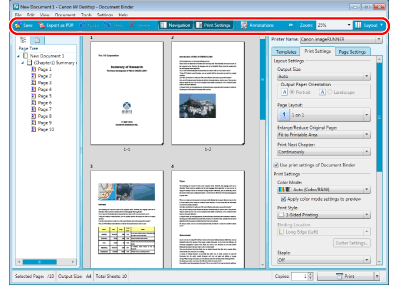
Menu Bar
Offers menu items for handling binder documents, starting Object Layout Editor to edit original pages, reducing margins, and specifying settings for displaying binder documents.

Toolbar
Offers menu items for handling binder documents, starting Object Layout Editor to edit original pages, reducing margins, specifying settings for displaying binder documents, and showing/hiding panes.
Status Bar
Shows the total number of binder document pages and the number of the currently selected page, as well as output paper size. The number of copies setting and buttons for printing/sending faxes are also on the status bar.
|
Note
|
|
The Status Bar can be shown/hidden from the [View] menu of the Menu Bar.
The [Print] button of the Status Bar changes to the [Send Fax] button if a fax is selected in [Printer Name] in the Print Settings Pane.
|