Canceling Check Out
Canceling check out enables you to cancel the checked out status of a document and to restore the status of the document that was stored in a Document Server Library/SharePoint Server Library before the document is checked out.
|
NOTE
|
|
You cannot cancel the check out when multiple documents are selected.
A user without full control permission (Document Server/SharePoint Server) cannot cancel check out while the document is checked out by another user.
|
1.
Select the checked out documents from the File List View Window.
2.
Click  for
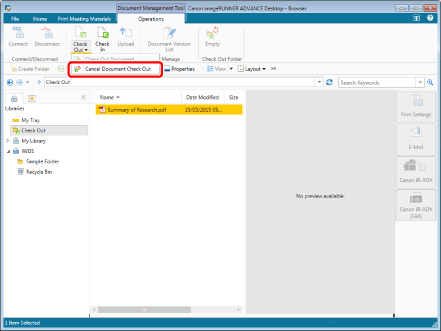
for  (Check Out) on the ribbon, and select [Cancel Check Out].
 for
for  (Check Out) on the ribbon, and select [Cancel Check Out].
Click  (Cancel Check Out) on the ribbon.
 (Cancel Check Out) on the ribbon.
Or, right-click and select [Cancel Document Check Out].

The checked out status of the document is canceled, and the status of the document before the check out is restored. Also, the check out icon will disappeared.
|
NOTE
|
|
When you select a document in a Document Server Library or SharePoint Server for which no connection has been established, the library must be connected. For more information on connecting, see the following.
When you cancel check out in the check out folder, cancel the check out status of the Document Server Library, and then delete the document. When you cancel check out while the document is open, canceling the check out is performed, but the deletion of the document fails. You must close the document before deleting it. Delete the document manually after closing it.
This operation can also be performed with the tool buttons on the toolbar. If tool buttons are not displayed on the toolbar of Desktop Browser, see the following to display them.
|