Scanning with the MF Toolbox
1
Place documents.
|
NOTE
|
When scanning from the platen glassYou can scan multiple documents only when
Selecting [PDF] or [PDF (Multiple Pages)] in [Save as Type].
[Paper Size] in the step 6 is set to "Fit the image."
|
2
Press [ ].
].
 ].
].
3
Select <Remote Scanner> using [ ] or [
 ] and press [OK].
 ] or [
 ] and press [OK].
The machine is now waiting to be scanned.


4
Double-click the [Canon MF Toolbox 4.9] icon on the desktop.
The MF Toolbox starts.

5
Click an applicable MF Toolbox button.

|
[Mail]
|
The document will be scanned and attached to an e-mail message in your e-mail application.
|
|
[OCR]
|
The document will be scanned and read by the OCR software.
|
|
[Save]
|
The document will be scanned and saved.
|
|
[PDF]
|
The document will be scanned and saved as a PDF file.
|
|
[Color Scan]
[B&W Scan] [Custom 1] [Custom 2] |
The document will be scanned and displayed in the registered application. A dialog box appears for each of the buttons.
|
|
NOTE
|
Applications that can be registered in the MF Toolbox buttonsThe following applications can be registered in the MF Toolbox buttons if they are installed.
[OCR]: Presto! PageManager
[PDF]: Presto! PageManager
|
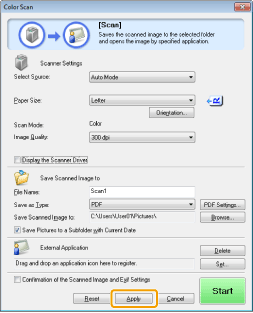
Specify the scanner settings as needed.
Clicking [Apply] saves the settings.
For details, see "Using the MF Toolbox."

7
Click [Start].
Scanning starts.
If you selected the [Display the Scanner Driver] check box in Step 6
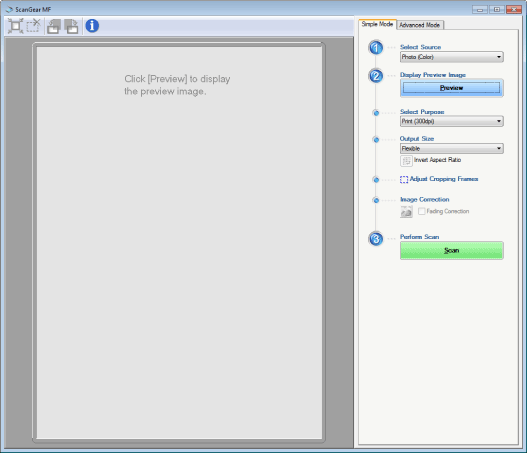
The [ScanGear MF] dialog box will appear.

|
(1)
|
Specify the settings as needed.
For details, see "Using the ScanGear MF."
|
|
(2)
|
Click [Scan].
Scanning starts.
|