Service Call Message
If a malfunction occurs and the machine cannot operate normally, a screen prompting you to contact your local authorized Canon dealer is displayed.
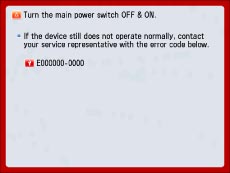
If a screen such as the one above is displayed, contact your local authorized Canon dealer. (See "Contacting Your Local Authorized Canon Dealer.")
If a screen such as the one below is displayed and the print or scan function does not operate normally, some functions may still be available.
When [Limited Func. Mode] is displayed:
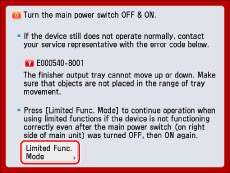
If [Limited Func. Mode] is displayed, you can temporally set the Limited Functions Mode to continue to use the machine until the cause of the malfunction is cleared. (See "Setting the Limited Functions Mode from the Service Call Message Screen.")
If a screen such as the one below is displayed and the print or scan function does not operate normally, some functions may still be available.
When the print or scan function does not operate normally:
The selected function cannot be used. Press [Main Menu] to return to the Main Menu.
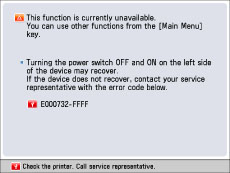
When a service call message is displayed on the bottom of the screen:
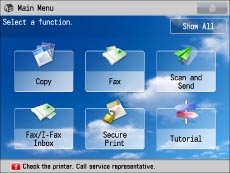
Even if a message prompting you to call your service representative appears on the bottom of the screen, some functions may still be available. (See "Functions Available When the Printer/Scanner Cannot Be Used Due to an Error.")
Contacting Your Local Authorized Canon Dealer
If a screen prompting you to contact your local authorized Canon dealer is displayed, follow the procedure described below.
1.
Turn OFF the main power of the main unit.
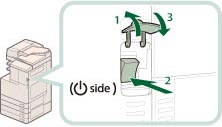 |
1. Open the main power switch cover. |
2. Press the main power switch to the "
|
|
3. Close the main power switch cover. |
|
IMPORTANT
|
|
If you turn OFF the main power switch when there is a job waiting to print, that job is erased.
|
2.
If the operation still cannot be performed correctly, turn the main power switch OFF, remove the power plug from the outlet, and contact your local authorized Canon dealer.
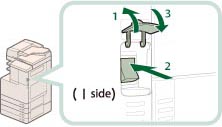 |
1. Open the main power switch cover. |
2. Press the main power switch to the "l" side. |
|
3. Close the main power switch cover. |
|
NOTE
|
|
For precautions to take when restarting the machine, see "Main Power and Energy Saver Key."
|
3.
If the machine still does not operate normally, follow the procedure below, and then contact your local authorized Canon dealer.
1. Turn the main power switch OFF.
2. Remove the power plug from the power outlet.
 WARNING WARNING |
|
Do not connect or disconnect the power cord with wet hands, as this may result in electrical shock.
|
 CAUTION CAUTION |
|
Always grasp the power plug when disconnecting the power cord. Pulling on the power cord may expose or snap the core wire, or otherwise damage the power cord. If the power cord is damaged, this could cause current to leak, resulting in a fire or electrical shock.
|
|
NOTE
|
|
When you contact your local authorized Canon dealer, have the following information available:
Product name
Details of the malfunction
The error code displayed on the touch panel display
|
Setting the Limited Functions Mode from the Service Call Message Screen
When [Limited Func. Mode] is displayed, follow the procedures below.
|
IMPORTANT
|
|
If you turn OFF the main power switch when there is a job waiting to print, that job is erased.
|
|
NOTE
|
|
If you set Limited Functions Mode to 'On' from the Service Call Message screen, [Limited Functions Mode] in [Management Settings] (Settings/Registration) is also set to 'On'. (See "Limiting Functions.")
|
1.
Press [Limited Func. Mode] → [Yes].
A message prompting you to restart the machine (turning the main power switch OFF, and then ON) appears.
2.
Turn OFF the main power of the main unit.
 |
1. Open the main power switch cover. |
2. Press the main power switch to the "
|
|
3. Close the main power switch cover. |
3.
Turn the main power OFF and then ON.
 |
1. Open the main power switch cover. |
2. Press the main power switch to the "l" side. |
|
3. Close the main power switch cover. |
The machine starts up in the Limited Functions mode.
|
NOTE
|
|
For precautions to take when restarting the machine, see "Main Power and Energy Saver Key."
|
Functions Available When the Printer/Scanner Cannot Be Used Due to an Error
You can use the following functions even when the Print and Scan functions are restricted.
Main Menu Screen
 : Available -: Unavailable
|
Available Functions
|
When the Print function is restricted:
|
When the Scan function is restricted:
|
|
Copy
|
-
|
-
|
|
Fax
|
 *1 *1 |
-
|
|
Scan and Send
|
 |
-
|
|
Scan and Store
|
 |
-
|
|
Access Stored Files
|
-
|
 *2 *2 |
|
Fax/I-Fax Inbox
|
-
|
 |
|
Secure Print
|
 |
 |
|
Remote Scan
|
 |
-
|
|
Web Access
|
 |
 |
|
Shortcut to Settings/Registration
|
-
|
-
|
|
Tutorial
|
 |
 |
|
iW Function Flow
|
-
|
-
|
|
Document Scan Code Analyzer *3
|
 |
 |
|
Other MEAP Applications*4
|
 |
 |
Touch Panel Display Left Side
 : Available -: Unavailable
|
Available Functions
|
When the Print function is restricted:
|
When the Scan function is restricted:
|
|
Quick Menu*5
|
 |
 |
|
The Status Monitor/Cancel Screen
|
 *6 *6 |
 |
Control Panel
 : Available -: Unavailable
|
Available Functions
|
When the Print function is restricted:
|
When the Scan function is restricted:
|
|
Settings/Registration
|
-
|
-
|
Operation From a Computer
 : Available -: Unavailable
|
Available Functions
|
When the Print function is restricted:
|
When the Scan function is restricted:
|
|
Remote UI
|
 |
 |
|
MEAP Application*4
|
 |
 |
|
*1
|
Sending a fax from a computer is not available.
|
|
*2
|
[Add Files (Scan and Store)] on the Edit File screen is not available.
|
|
*3
|
Document Scan Code Analyzer is included in the Document Scan Lock Kit. (See "Optional Products Required for Each Function.")
|
|
*4
|
Available by installing each MEAP application. May not be available depending on the restricted functions.
|
|
*5
|
The registered button may not be available depending on the restricted functions.
|
|
*6
|
[Print List] on the Job Log screen and [Register] on the Consumable screen are not available.
|
|
IMPORTANT
|
|
A print job is automatically cancelled when the Print function is restricted. A scan job is automatically cancelled when the Scan function is restricted.
The machine may not enter the Sleep mode completely when a function is restricted due to an error.
|
|
NOTE
|
|
If the target function is restricted due to an error, the function is not available when you use the shortcut key on the left side of the touch panel display or when you use the Quick Menu.
|
 " side.