Checking File Information/Adding and Deleting Files
You can check the detailed information for files on the memory media (file name, location, date modified etc.), and add or delete files.
Checking the Detailed Information for a File
1.
Press [Access Stored Files] → [Memory Media].

2.
Select the desired memory media → select the directory where the file you want to check is stored.

3.
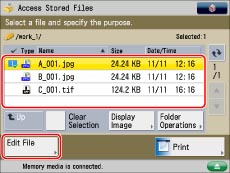
Select the desired file → press [Edit File].
4.
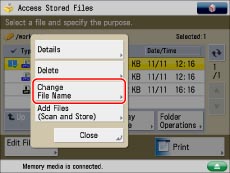
Press [Details] → [OK].

If you want to change the file name, press [Change File Name].
For information on the icons displayed on the Details screen, see "Types of Network/Memory Media Icons."
Deleting a File
1.
Press [Access Stored Files] → [Memory Media].

2.
Select the desired memory media → select the directory where the file you want to delete is stored.

3.
Select the desired file → press [Edit File].

4.
Press [Delete].

5.
Press [Yes].
Changing a File Name (Change File Name)
1.
Press [Access Stored Files] → [Memory Media].

2.
Select the desired memory media → select the directory where the file you want to change the file name is stored.

3.
Select the desired file → press [Edit File].

4.
Press [Change File Name].
|
NOTE
|
|
If you select multiple files and press [Change File Name], the selected (highlighted) file becomes the file whose title is changed.
|
5.
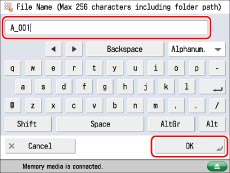
Enter a file name → press [OK].
Adding a File (Scan and Store)
You can scan an original and store it as a file.
1.
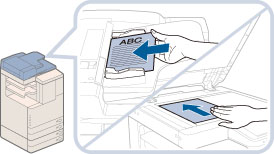
Place your originals.
|
NOTE
|
|
For instructions on placing originals, see "Placing Originals."
|
2.
Press [Access Stored Files] → [Memory Media].

3.
Select the desired memory media → select the directory where you want to store the file.

4.
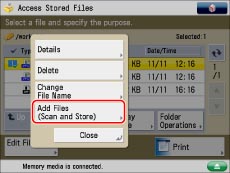
Press [Edit File].

5.
Press [Add Files (Scan and Store)].
6.
Specify the desired scan settings.
7.
Press  (Start).
 (Start).
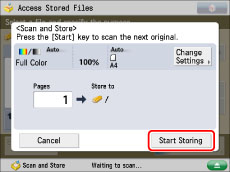
If the following screen is displayed, after the last batch of originals is scanned, press [Start Storing].
If you place your original on the platen glass, press  (Start) to scan each original.
 (Start) to scan each original.