Adjusting Density Manually
You can manually adjust the density to the most appropriate level for a file to print.
|
IMPORTANT
|
|
This mode can be used only for printing a file stored in a mail box.
|
Setting Density Before Printing
1.
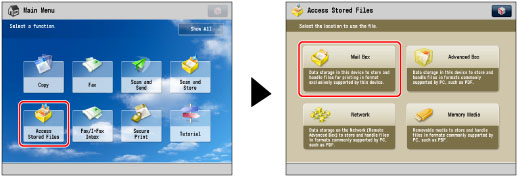
Press [Access Stored Files] → [Mail Box].

2.
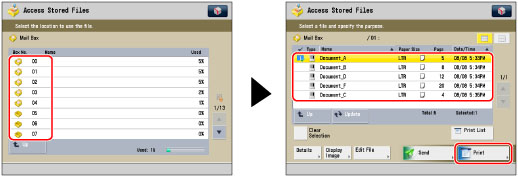
Select the desired Mail Box → select the desired file → press [Print].

3.
Press [Change Print Settings].

4.
Press [Options] → [Print Density].

5.
Press  or
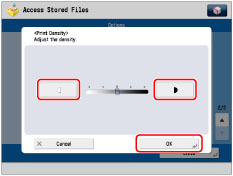
or  to adjust the print density → press [OK] → [Close].
 or
or  to adjust the print density → press [OK] → [Close].
The density becomes lighter as the indicator is moved to the left and darker as the indicator is moved to the right.
Setting Density During Printing
1.
Press  or
or  to adjust the print density.
 or
or  to adjust the print density.
The density becomes lighter as the indicator is moved to the left and darker as the indicator is moved to the right.
|
IMPORTANT
|
|
You cannot adjust the print density while printing in the Secure Watermark or Document Scan Lock mode.
If you change the density in [Options], adjusting the density during printing may not have any effect on the output.
|
|
IMPORTANT
|
|
For information on the modes which cannot be set in combination with this mode, see "Unavailable Combination of Functions."
|
|
NOTE
|
|
If you adjust the density when scanning and storing an original into a mail box, the selected density may be modified by the machine if you select to merge the file when printing it.
|