Specifying the Destination (File Server)
This section describes how to specify destinations.
See the following sections to specify destinations.
|
For instructions on sending, see "Scanning Fundamentals (File Server)."
|
Specifying destinations using one-touch keys
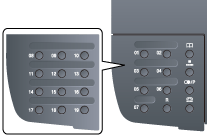
Press the one-touch key (01 to 19) of the destination.

To select a destination from the one-touch keys, you need to register destinations in these keys in advance. (File server destinations can be registered only from the Remote UI.)
When the wrong key is pressed
|
(1)
|
Press [
 ] (Clear). ] (Clear). |
|
|
(2)
|
Select <Yes> using [
 ] and press [OK]. ] and press [OK]. |
|
 |
To clear all the scan settings specified, press [
 ] (Reset). ] (Reset). |
|
Specifying destinations using coded dial codes
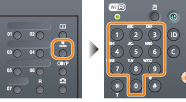
Press [ ] (Coded Dial) and enter the three-digit registration number (001 to 181) with the numeric keys.
 ] (Coded Dial) and enter the three-digit registration number (001 to 181) with the numeric keys.
To select a destination from the coded dial codes, you need to register destinations in these codes in advance. (File server destinations can be registered only from the Remote UI.)
When the wrong key is pressed
|
(1)
|
Press [
 ] (Clear). ] (Clear). |
|
|
(2)
|
Press [
 ] to select <Yes> and press [OK]. ] to select <Yes> and press [OK]. |
|
|
|
 |
To clear all the scan settings specified, press [
 ] (Reset). ] (Reset). |
Specifying destinations using the address book
When you type an alphanumeric character from the operation panel or search for an alphanumeric character in the address book screen, fax numbers with the matched letter or number are displayed. You can select your destination from the displayed numbers.
To select a destination from the address book, you need to register destinations in the address book in advance. (File server destinations can be registered only from the Remote UI.)
1
Press [ ] (Address Book).
 ] (Address Book).
2
Press [ ] or [
 ] to search for your destination.
 ] or [
 ] to search for your destination.
Select <All> to display all destinations.

3
Select the destination using [ ] or [
 ] and press [OK].
 ] or [
 ] and press [OK].