Basic Scan Flow (Saving to USB Memory Device)
You can save scanned documents to USB memory device inserted in the USB port.
This section describes the basic procedure.
1
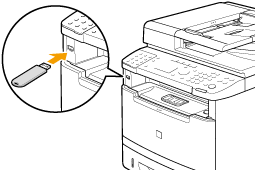
Insert a USB memory device to the USB port.
The machine will begin to read the device when USB memory is inserted. Do not touch or remove the device from the port.
2
Place documents.
3
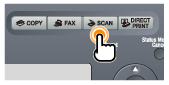
Press [ ].
].
].
4
Select <Memory Media> using [ ] or [
 ] and press [OK].
] or [] and press [OK].
5
Specify the scan settings based on your purpose of the scan.
The following settings can be changed.
Scan size
Color Mode
File Format
Density
Original orientation
Original Type
2-Sided Original
Sharpness
Data Size
The settings specified here are effective only for the current task. To apply these settings to all tasks, see "Changing the Default Scan Settings for Saving to USB Memory Device."
6
Press [ ] (Start).
] (Start).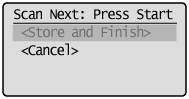
Scanning starts.
When scanning from the feeder, or set the <File Format> to <JPEG>After scanning the document, the scanned data is sent to the USB memory.
When scanning from the platen glass, or set <File Format> to other than <JPEG>Proceed to Step 7
|
To continuously scan the document, press [] (Start).
] (Start).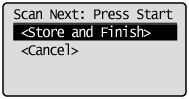
To Cancel the scan
|
(1)
|
Select <Cancel> with [
] or [], and then press [OK]. |
|
(2)
|
Select <Yes> with [
] or [], and then press [OK]. |
8
Select <Store and Finish> with [] or [], and then press [OK].
] or [], and then press [OK].The scanned data is sent to the USB memory.
Folder and file names that can be saved
|
Folder name
|
The "SCAN_00" folder is created in the top level directory (root folder) in the USB memory device. Scanned document files are saved in this folder.
When the "SCAN_00" folder reaches limit, the "SCAN_01" folder is automatically created. Folders up to "SCAN_99" are automatically created when the current working folder becomes full.
|
|
File name
|
File names between "SCAN0001.XXX" and "SCAN9999.XXX" are provided. ("XXX" is the extension for the file format.)
The two-digit folder number is provided in the fifth and sixth characters from the left.
A maximum of 100 files can be saved in a folder.
|
 ] (Reset).
 ] (Status Monitor/Cancel).