Correcting Copy Images
|
Before correcting copy images, see "Attention (Correcting Copy Images)."
|
You do not need to correct (adjust) copy image normally.
Perform this function in case the gradation or density of the output is extremely different from those of the original document.
|
IMPORTANT
|
When copy image correction can be performedThe following messages are not appeared in the display.
<End of Cart. Life.>
<Prepare toner cartridge.>
<Cartridge replacement is needed soon.>
There are no jobs which use the scanner functions and printer functions.
The following paper is loaded in the paper drawer.
- Paper Size: A4 or Letter - Paper Type: Plain paper or Recycled paper - Sheets of paper: 1 sheets or more If you execute copy image adjustment with running out tonerEven you try to perform the adjustment; the image may not be improved.
Change the toner cartridge and redo the adjustment.
|
1
Press [ ] (Menu).
 ] (Menu).
2
Select <Adjustment/Maintenance> using [ ] or [
 ] and press [OK].
 ] or [
 ] and press [OK].
Select <Copy Image Adjustment> using [ ] or [
 ] and press [OK].
 ] or [
 ] and press [OK].
4
Make sure that paper is loaded, and then press [OK].
Load paper displayed on the screen.

5
Make sure the procedures for the copy image adjustment, and then press [OK].
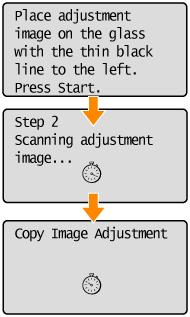
To perform the auto gradation adjustment, follow the two procedures (print -> scan) displayed on the screen.

 |
A test chart (adj. image 1) is printed.
|
6
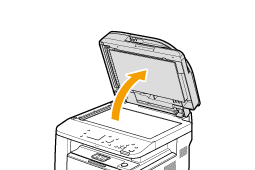
Open the feeder or the platen glass cover when the screen displayed during the printing disappears.

Place the printed paper on the platen glass with the print side face down.
Set the black stripe (A) on the left side.

8
Close the feeder or the platen glass cover gently.
9
Press [ ] (Start).
 ] (Start).
Scanning of the test chart starts.

|
NOTE
|
Check the temperature of the installation siteIf the room temperature is too low, correction may not be performed properly.
|
 If <Adjustment failed.> appears If <Adjustment failed.> appears |
|||||||||
|
Is the paper loaded correctly?
Is the test chart placed on the platen glass correctly?
Has a paper jam occurred?
|
10
When the correction is complete, the screen in Step 3 reappears. Press [ ] (Menu) to close the menu screen.
 ] (Menu) to close the menu screen.
11
Remove the test chart (adjusted image 1) placed on the platen glass in Step 7.