You can print from a Windows Vista/7/8/Server 2008/Server 2012 computer using the WSD (Web Services on Devices) protocol.
To use WSD, follow the procedures provided in "Installing the MF Drivers" and "Setting WSD."
Installing the MF Drivers on the WSD Network
|
IMPORTANT
|
When you are in an IPv6 environment:You cannot install the MF Drivers from the CD-ROM setup screen.
Follow the steps in the procedure below.
|
To enable or disable WSD:Enable or disable WSD from the machine's operation panel. For more information, see "Machine Connection Method (LPD/RAW/WSD)."
|
Installing the MF Drivers
1
Open the printer folder.
2
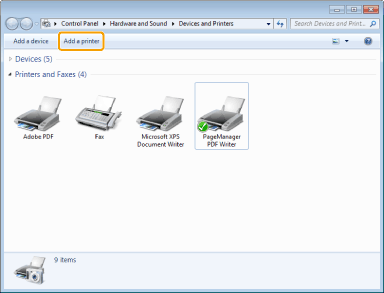
Click [Add a printer].
3
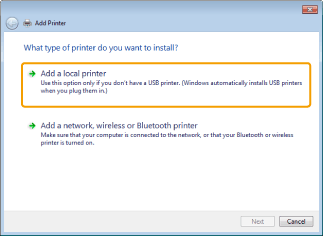
Click [Add a local printer].
4
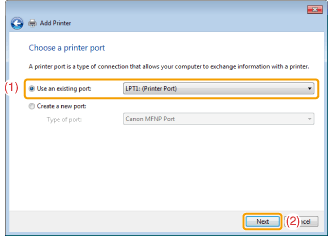
Confirm that [LPT1: (Printer Port)] is displayed for [Use an existing port] and click [Next].
5
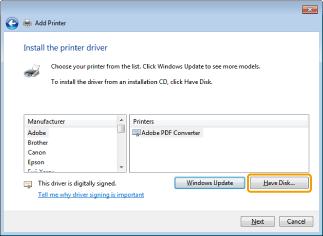
Click [Have Disk].
6
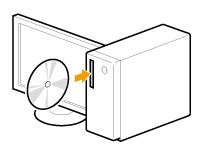
Insert the User Software CD-ROM into the slot on your computer.
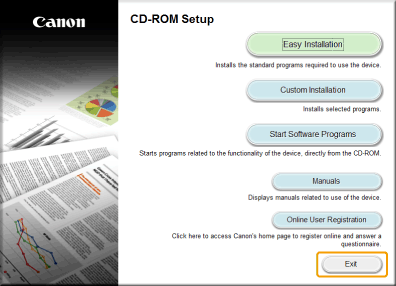
When the following screen appears, click [Exit].
 When [AutoPlay] is displayed: When [AutoPlay] is displayed: |
|
Click [
 ] to close the dialog box. ] to close the dialog box. |
7
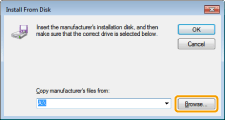
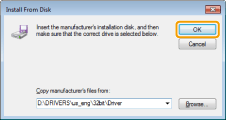
Click [Browse].
8
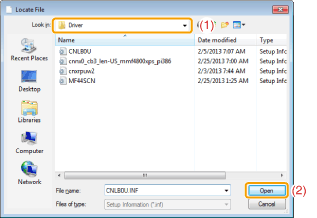
Open the folder where the printer driver files are stored.
For 32-bit versions:
Open [DRIVERS] -> [us_eng] -> [32bit] -> [Driver] on the CD-ROM and click [Open].
For 64-bit versions:
Open [DRIVERS] -> [us_eng] -> [x64] -> [Driver] on the CD-ROM and click [Open].
 When you are not sure which operating system that you are using on your computer: When you are not sure which operating system that you are using on your computer: |
9
Click [OK].
10
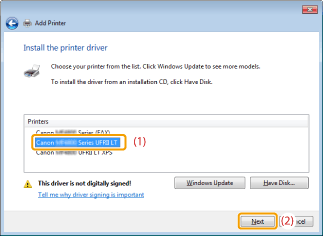
Select the printer driver you are using, and then click [Next].
11
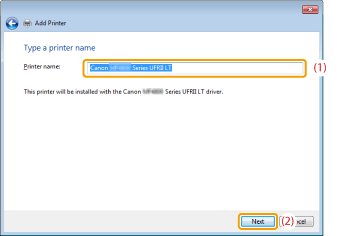
Specify the printer name.
|
(1)
|
Enter a different name to change the default printer name.
|
||
|
(2)
|
Click [Next].
|
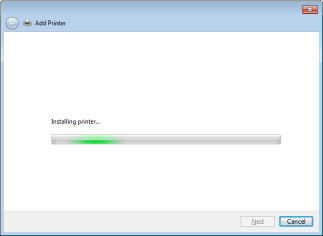
-> Installation begins. Wait until the following screen closes.
 When [User Account Control] appears: When [User Account Control] appears: |
|
Click [Yes] or [Continue].
|
12
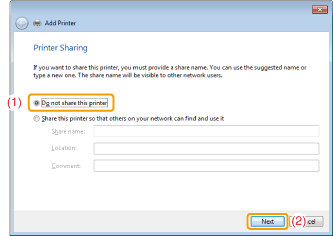
Select [Do not share this printer] and click [Next].
 |
To set the machine as a shared printer, configure the related settings after you have performed the procedure provided in "Setting WSD."
|
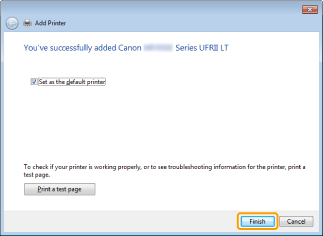
Click [Finish].
 |
When [Set as the default printer] is displayed, specify whether to choose the machine as the default printer (Windows 7/8/Server 2008 R2/Server 2012).
|
 |
Eject the CD-ROM when the following screen appears.
|
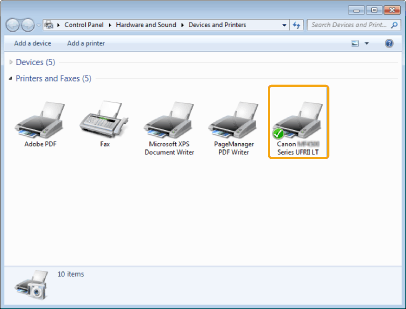
-> The icon is added to the printer folder.
Setting WSD
1
Open the network folder.
For Windows Vista/Server 2008:
Select [Network] from the [Start] menu.
For Windows 7/Server 2008 R2:
Select [Computer] from the [Start] menu and click [Network].
For Windows 8/Server 2012:
Right-click the lower-left corner of the screen, select [File Explore], and then click [Network].
2
Right-click the machine icon and select [Install] from the pop-up menu.
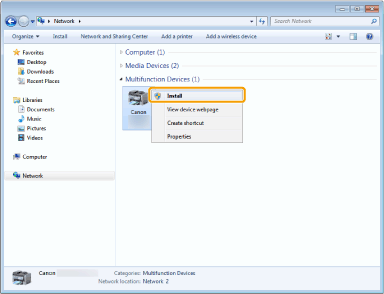
-> The icon is add to the printer folder. Installation is complete.

 When [User Account Control] appears: When [User Account Control] appears: |
|
Click [Yes] or [Continue].
|
 |
Follow the steps in the procedure below to delete the icon added in step 13, if you do not need it.
|