Setting IP v. 6
This section describes the procedure for setting IP v. 6.
Specify the settings for IP v. 6 using the Remote UI after specifying the settings for IP v. 4.
|
NOTE
|
|||||||||||||||
About the IP v. 6 addressThis printer can have up to seven IP v. 6 addresses of the following types. (Only one address can be registered manually.) IP v. 6 communication allows you to use multiple IP v. 6 addresses simultaneously.
|
1
Start the Remote UI, and then log in as Administrator.
2
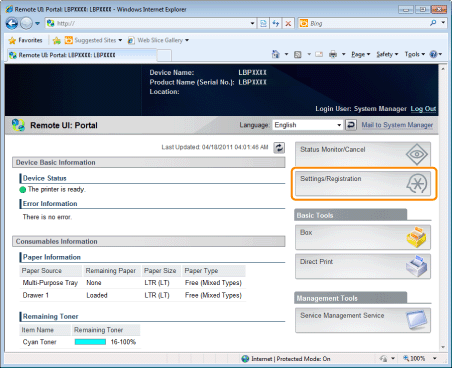
Click [Settings/Registration].
3
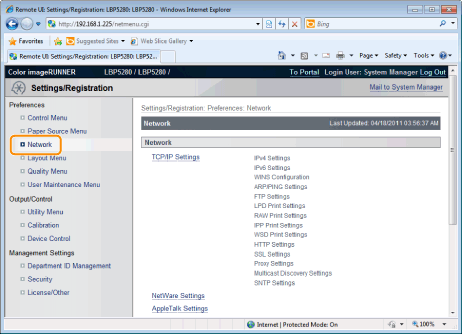
Select [Network] from the [Preferences] menu.
4
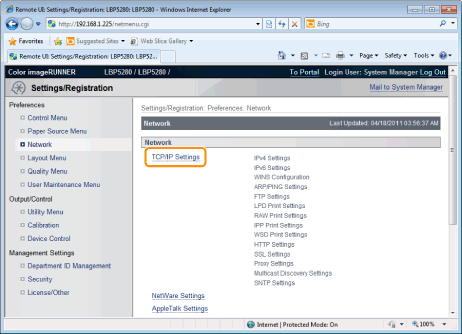
Click [TCP/IP Settings].
5
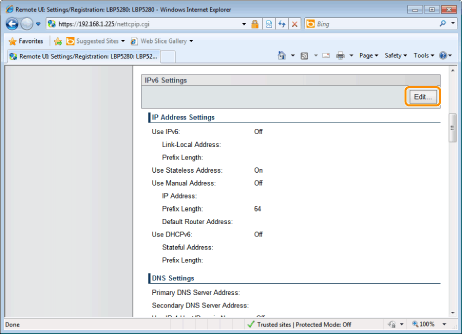
Click [Edit...] under [IPv6 Settings].
6
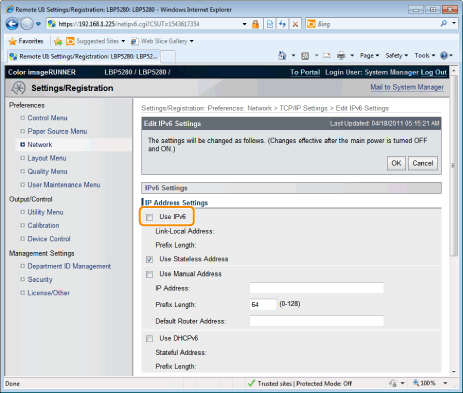
Select the [Use IPv6] check box.
7
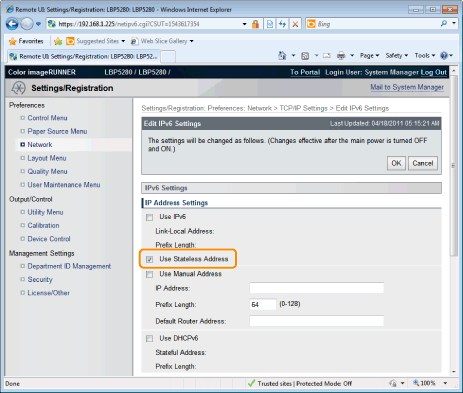
Specify the stateless address.
Check the [Use Stateless Address] check box when using a stateless address.
|
NOTE
|
Stateless Address RetentionAfter the [Use Stateless Address] check box is selected and the printer is restarted, the stateless address is displayed automatically. This stateless address is discarded when the printer is turned OFF.
|
8
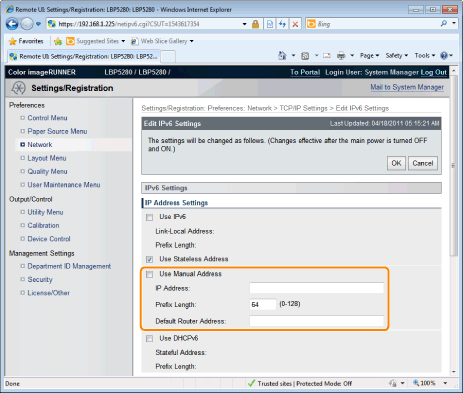
If you want to use a manual address, specify the following settings.
If you do not want to use a manual address, proceed to Step 9.
|
(1)
|
Select the [Use Manual Address] check box.
|
|
(2)
|
Enter [IP Address].
|
|
(3)
|
Enter [Prefix Length].
|
|
(4)
|
Enter [Default Router Address] as needed.
|
|
IMPORTANT
|
Addresses which cannot be entered in [IP Address] and [Default Router Address]An address which starts with "ff" (multicast address)
An address which starts with "0:0:"
|
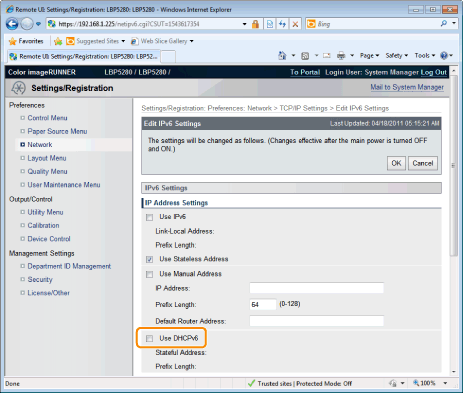
Specify DHCP v. 6.
When using the stateful address, select the [Use DHCPv6] check box.
If you want to use the DNS server, specify the following settings.
If you do not want to use the DNS server, proceed to Step 11.
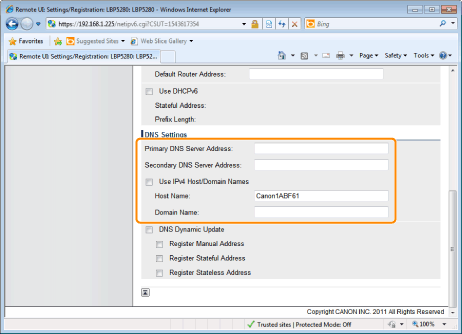
You can specify the following [IPv6 Settings].
|
(1)
|
Enter the IP address of the primary DNS server in [Primary DNS Server Address].
|
||
|
(2)
|
Enter the IP address of the secondary DNS server in [Secondary DNS Server Address].
|
||
|
(3)
|
Set [Host Name] and [Domain Name].
Select the [Use IPv4 Host/Domain Names] check box to use the same host name and domain name as IPv4.After the printer is restarted, the host name and domain name set by IPv4 are set automatically.
When using a host name and domain name that are different from IPv4, enter [Host Name] and [Domain Name]. You can enter up to 47 characters.
|
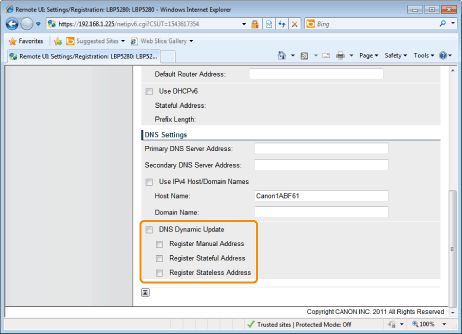
If you want to use DNS Dynamic Update, specify the following settings.
If you do not want to use the DNS server, proceed to Step 12.
|
(1)
|
Select the [DNS Dynamic Update] check box.
|
||
|
(2)
|
Set whether to register the IPv6 address to the DNS server during DNS dynamic updates.
If you select the [Register Manual Address] check box, a manual address is registered to the DNS server.
If you select the [Register Stateful Address] check box, a stateful address is registered to the DNS server.
If you select the [Register Stateless Address] check box, a stateless address is registered to the DNS server.
|
|
IMPORTANT
|
DNS Dynamic UpdateDNS Dynamic Update is a function that adds the IP address of the device and the names specified as the host name and domain name to the DNS server automatically.
This function can be used in the environment in which a Dynamic DNS server is being used. When using the DNS Dynamic Update functionYou need to set the IP address, host name, and domain name of the DNS server.
|
Click [OK].
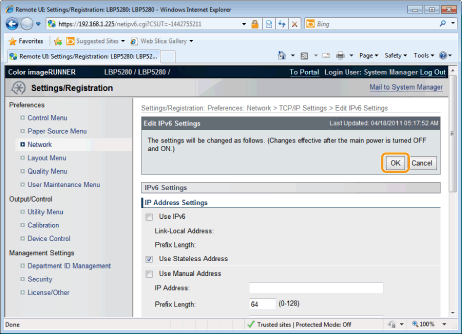
13
Perform a hard reset or restart the printer.
|
→
|
After performing a hard reset or restarting the printer, the settings are effective.
|
|
NOTE
|
||||||
To perform a hard resetYou can perform a hard reset using the following procedure.
|
