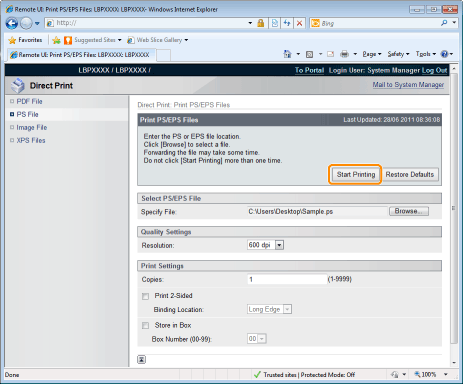
Printing the PS/EPS File Using the Direct Print Function
1
Start the Remote UI.
2
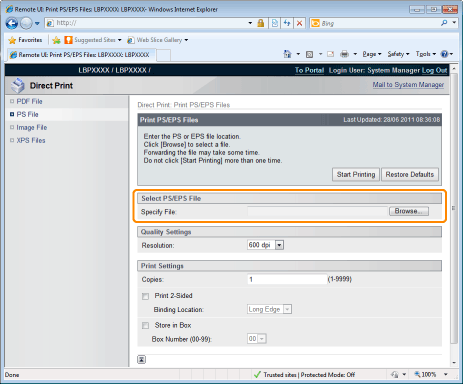
Select [PS File] from the [Direct Print] menu.

3
Specify [Select PS/EPS File].
Click [Browse...], select the file, and then click [Open...].
4
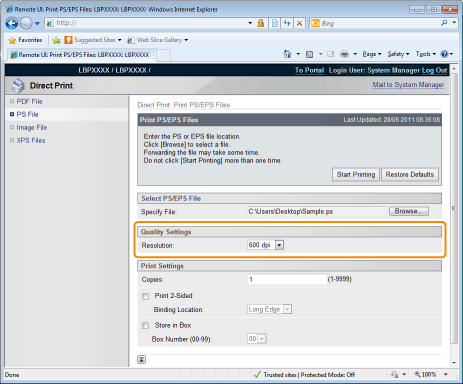
Specify the settings for [Quality Settings] as the following, as needed.
|
[Resolution]
|
Specify the resolution for printing the data. It is effective to set [600 dpi] when printing photographs at standard quality, and to set [1200 dpi] when printing at a higher quality.
|
5
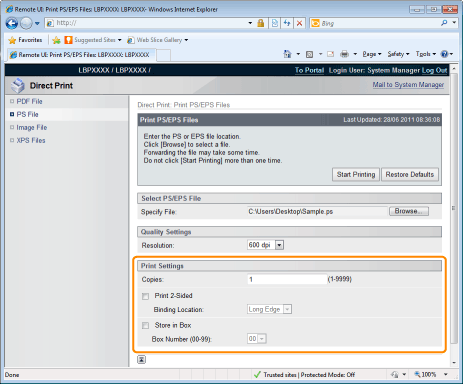
Specify the settings for [Print Settings] as the following, as needed.
|
[Copies]
|
Specify the number of copies to be printed.
|
|
[Print 2-Sided]
|
Specify 1-sided or 2-sided printing.
|
|
[Binding Location]
|
Set the binding position on the long side of the paper (long-edged binding) or the short side of the paper (short-edged binding). If binding is set from the printer side, the position of the "gutter" is automatically adjusted on the front and back sides of the paper.
|
|
[Store in Box]
|
(It is only displayed when an SD card is used.)
When storing it in a box, check the [Store in Box] check box before selecting the box where you want to store it.
|
6
Click [Start Printing].
 |
Do not keep clicking [Start Printing] while the file is transferring. Sometimes it takes time to transfer a file, but if you keep clicking during the transfer, a file failure may occur and it may be impossible to transfer it.
|
|
→
|
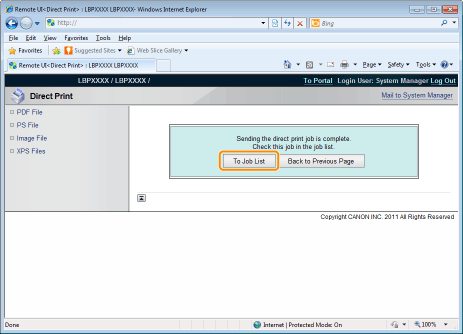
When the print job has finished sending, the display switches and the following message is displayed.
|
|
Press [To Job List] to check the print job that was sent.
|