Changing the Settings Using Web Browser (Remote UI)
1
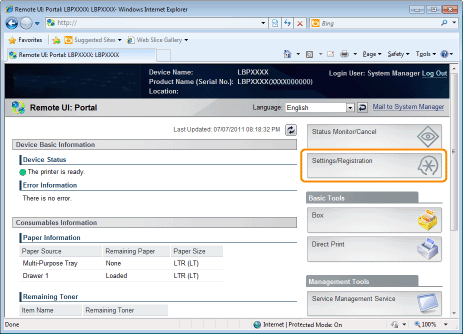
Start the Remote UI, and then log in as Administrator.
2
Click [Settings/Registration].
3
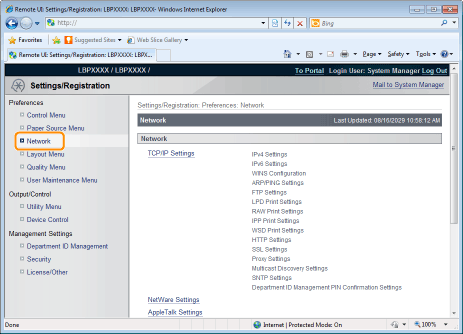
Select [Network] from the [Preferences] menu.
4
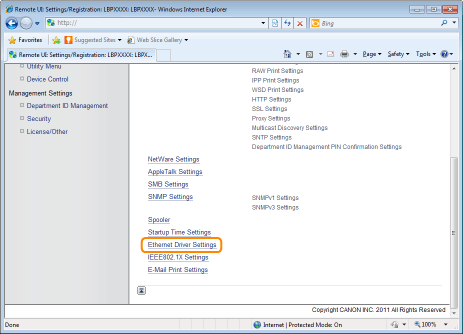
Click [Ethernet Driver Settings].
5
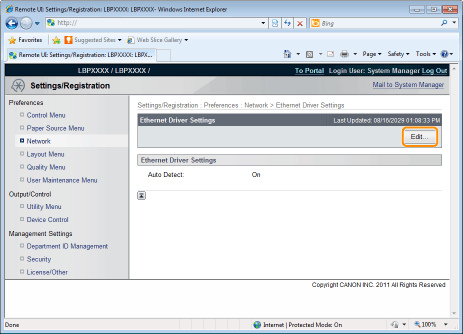
Click [Edit...].
|
(1)
|
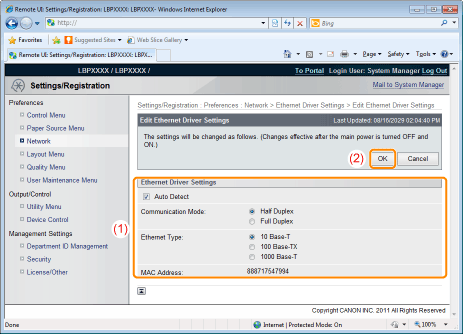
Set the Ethernet driver.
If you want the communication method and Ethernet type to be set automatically, select the [Auto Detect] check box.
If you want to fix the settings for communication method and Ethernet type, clear the [Auto Detect] check box, and set the following. Using [Communication Mode], select the Ethernet communication method that matches the network environment you are using.
Using [Ethernet Type], Select the Ethernet type that matches the network environment you are using.
|
||||||||
|
(2)
|
Click [OK].
|

6
Perform a hard reset or restart the printer.
|
→
|
After performing a hard reset or restarting the printer, the settings are effective.
|
|
NOTE
|
||||||
To perform a hard resetYou can perform a hard reset using the following procedure.
|