Configuring a Computer that Performs Printing
Configure all the computers to be used for printing so that they can be used on an SMB network.
Connecting to an SMB Network
1
Perform the following procedure.

From the [Start] menu, select [Settings] → [Network and Dial-Up Connections].

From the [Start] menu, select [Control Panel], and then click [Network and Internet Connections] → [Network Connections].

From the [Start] menu, select [Control Panel], and then click [View network status and tasks] → [Manage network connections].


From the [Start] menu, select [Control Panel], and then click [View network status and tasks] → [Change adapter settings].

From the [Start] menu, select [Control Panel] → [Network Connections] → [Local Area Connection].

From the [Start] menu, select [Control Panel], double-click [Network and Sharing Center], and then click [Manage network connections].
2
Display the [Local Area Connection Properties] dialog box.


Right-click the [Local Area Connection] icon, and then select [Properties] from the pop-up menu.
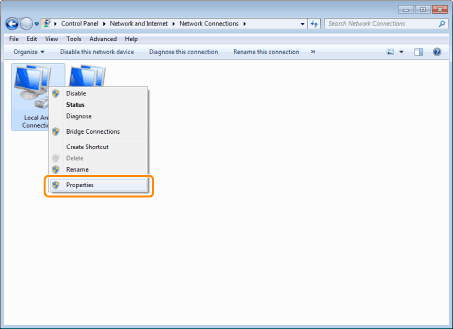

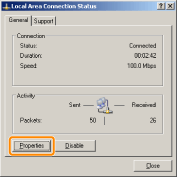
Click [Properties].
 If the [User Account Control] dialog box appears If the [User Account Control] dialog box appearsClick [Yes] or [Continue].
|
3
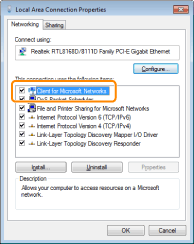
Make sure that the check boxes for the following options are selected.
[Client for Microsoft Networks]
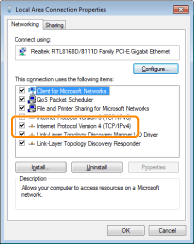
[Internet Protocol Version 4 (TCP/IPv4)] (or [Internet Protocol (TCP/IP)])
If the check boxes are not selected, select them.
4
Double-click [Internet Protocol Version 4 (TCP/IPv4)] (or [Internet Protocol (TCP/IP)]).
5
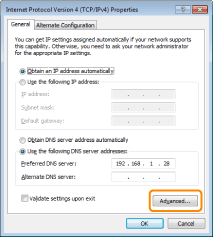
Click [Advanced] in the [General] sheet.
6
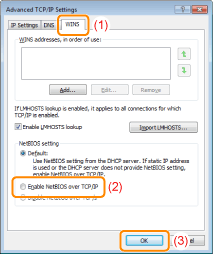
Enable NetBIOS over TCP/IP.
|
(1)
|
Display the [WINS] sheet.
|
|
(2)
|
Select [Enable NetBIOS over TCP/IP].
|
|
(3)
|
Click [OK].
|
7
Continue to click [OK] until all the dialog boxes close.
 If a message that prompts you to restart the computer appears If a message that prompts you to restart the computer appearsRestart the computer.
|
Installing the Printer Driver
A printer driver is required for printing. Following "Printer Driver Installation Guide", install the printer driver.
 |
For details on the procedure for viewing "Printer Driver Installation Guide", see "Installation."
|
|
NOTE
|
||||||
If the screen that prompts you to select a port appears during the installationPerform the following procedure.
|