Configuring the Protocol Settings
This section describes the procedure for specifying the settings using the Remote UI.
 |
In the Remote UI, you can specify the settings by accessing the printer from a Web browser via a network.
|
|
IMPORTANT
|
Before configuring the protocol settingsWhen configuring the protocol settings for the printer using the above software, the TCP/IP protocol must be able to be used in your network environment.
Make sure that each setting option for TCP/IP is specified, the printer and computer are connected properly, and the printer is ON.
About SMB printingYou can use SMB printing only when an SD card is installed.
|
|
NOTE
|
||
When specifying the settings using software other than the Remote UIYou can also specify the settings using the following software.
You can specify the settings by accessing the FTP server of the printer using Command Prompt.
About the screenshotsThis procedure is described using screenshots from Windows 7.
|
1
Start the Remote UI, and then log in as Administrator.
2
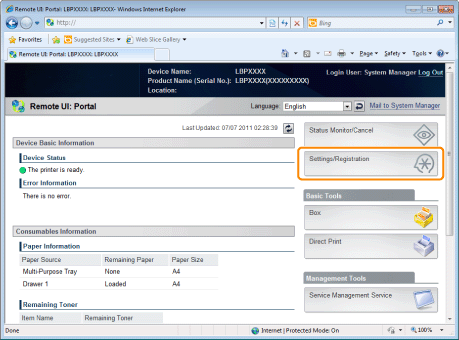
Click [Settings/Registration].
3
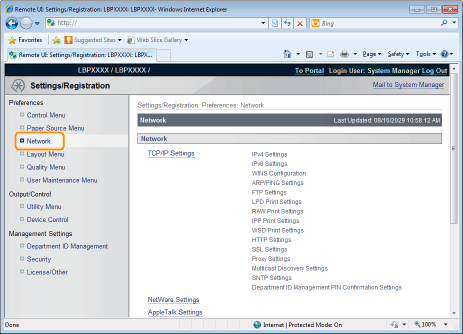
Select [Network] from the [Preferences] menu.
4
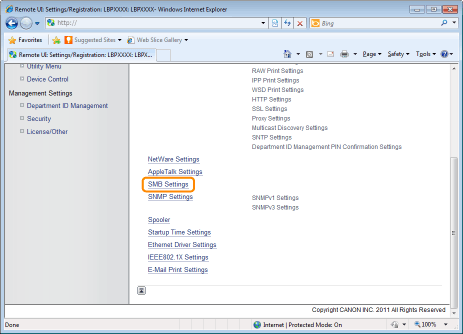
Click [SMB Settings].
5
Click [Edit...].

6
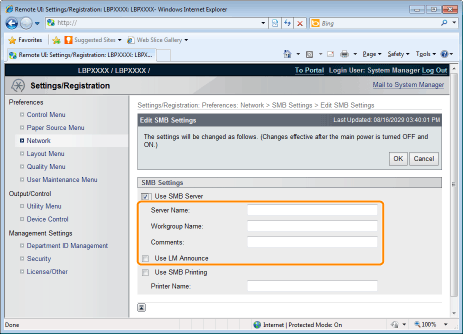
Select the [Use SMB Server] check box.

|
NOTE
|
When the [Use SMB Server] check box is clearedThe printer is not detected on the SMB network.
|
Specify the settings for SMB.
|
[Server Name]
|
Enter the computer name to which the printer belongs. Up to 15 characters can be entered.
|
||||
|
[Workgroup Name]
|
Enter the name of the work group to which the printer belongs. Up to 15 characters can be entered.
|
||||
|
[Comments]
|
If necessary, enter comments about the printer. You can enter up to 48 characters.
|
||||
|
[Use LM Announce]
|
When announcing the existence of the printer to the LAN Manager, select the [Use LM Announce] check box. When not making an announcement, clear [Use LM Announce].
|
8
Specify the settings for SMB printing.
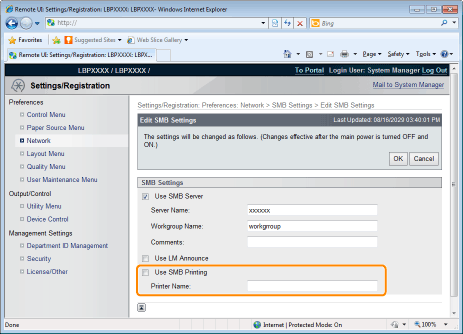
When using SMB printing
|
1.
|
Select the [Use SMB Printing] check box.
|
||
|
2.
|
Enter the name of this printer in [Printer Name]. Up to 13 alphanumeric characters can be entered.
|
When not using SMB printing
Clear the [Use SMB Printing] check box.
9
Click [OK].
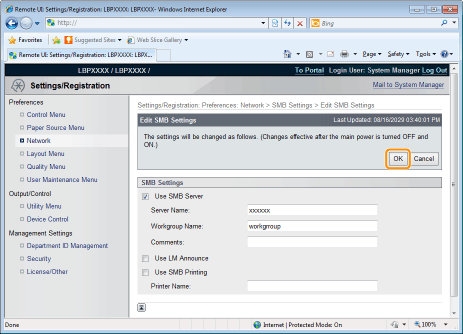
If you want to specify the settings for WINS, proceed to Step 10.
If you do not want to specify the settings for WINS, proceed to Step 14.
When setting WINS, select [Network] in [Preferences].

11
Click [TCP/IP Settings].

12
Click [Edit...] in [WINS Configuration].

13
Set WINS.
When Using WINS Resolution
Select the [WINS Resolution] check box, and set the following items.
|
[WINS Server Address]
|
Enter the IP address of the WINS server.
|
||||
|
[Scope ID]
|
Enter [Scope ID] as needed. You can enter up to 63 characters.
|
||||
|
Set the following items when registering printers on the WINS server.
|
|||||
|
[SMB Server Name]
|
Enter the WINS server name set in Procedure 7.
|
||||
|
[SMB Workgroup Name]
|
Enter the workgroup name set in Procedure 7.
|
||||
When not Using WINS Resolution
Clear the [WINS Resolution] check box.
|
IMPORTANT
|
If [Scope ID] is specifiedThe printer cannot communicate with the computers that have a different scope ID.
|
Click [OK].
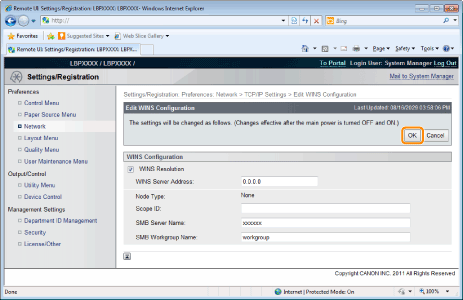
15
Perform a hard reset or restart the printer.
|
→
|
After performing a hard reset or restarting the printer, the settings are effective.
|
|
NOTE
|
||||||
To perform a hard resetYou can perform a hard reset using the following procedure.
|