Installing from the Printer Folder
The procedure for installing the printer driver from the printer folder varies depending on your operating system.
See the following according to your operating system.
Windows Vista, 7, and Server 2008
1
Turn the computer on, and then log on to Windows.
2
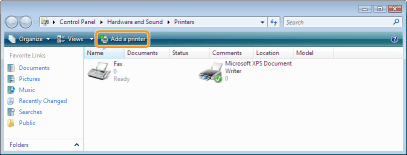
Open the printer folder.
3
Click [Add a printer].
4
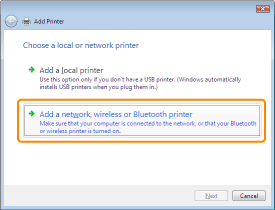
Click [Add a network, wireless or Bluetooth printer].
5
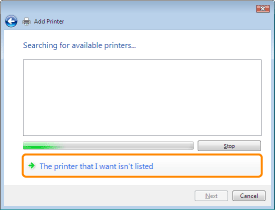
Click [The printer that I want isn't listed].
6
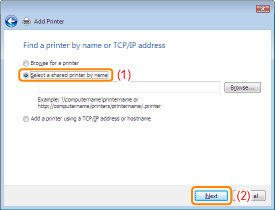
Perform the following procedure.
|
(1)
|
Select [Select a shared printer by name].
|
|
(2)
|
Click [Next].
|
7
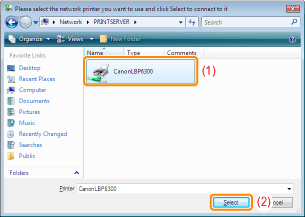
Select a shared printer.
|
(1)
|
Select a shared printer on the print server.
|
|
(2)
|
Click [Select].
|
|
NOTE
|
Specifying the network path directlySpecify the network path as "\\the print server name (the computer name of the print server)\the printer name."
|
8
Click [Install driver].
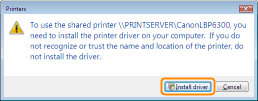
 If the [User Account Control] dialog box appears If the [User Account Control] dialog box appearsClick [Continue] or [Yes].
|
9
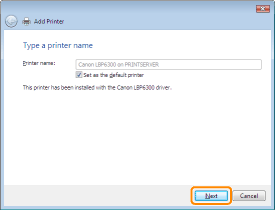
Click [Next].
 |
When [Set as the default printer] is displayed, select whether or not to use the printer as the default printer. (Windows Vista and Server 2008)
|
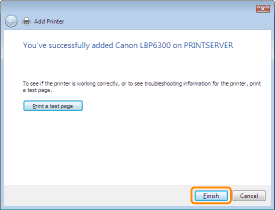
10
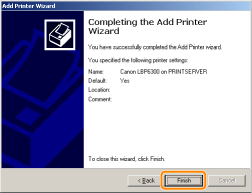
Click [Finish].
If you want to print a test page, click [Print a test page].
 |
When [Set as the default printer] is displayed, select whether or not to use the printer as the default printer. (Windows 7 and Server 2008 R2)
|
Windows XP and Server 2003
1
Turn the computer on, and then log on to Windows.
2
Open the printer folder.
3
Display [Add Printer Wizard].

Click [Add a printer].
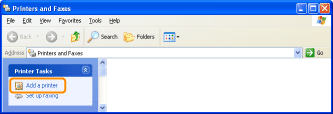

Double-click [Add Printer].

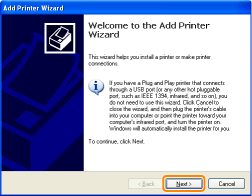
4
Click [Next].
5
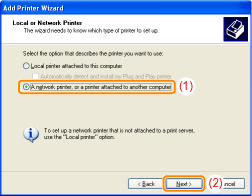
Select a printer type.
|
(1)
|
Select [A network printer, or a printer attached to another computer].
|
|
(2)
|
Click [Next].
|
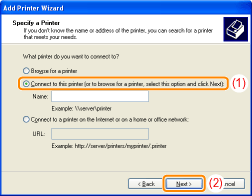
6
Perform the following procedure.
|
(1)
|
Select [Connect to this printer (or to browse for a printer, select this option and click Next)].
|
|
(2)
|
Click [Next].
|
7
Select a shared printer.
|
(1)
|
Select a shared printer on the print server.
|
|
(2)
|
Click [Next].
|
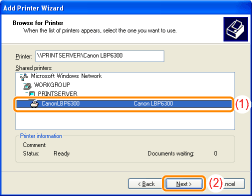
 If the [Connect to Printer] dialog box appears If the [Connect to Printer] dialog box appearsFollow the directions in the message.
|
|
NOTE
|
Specifying the network path directlySpecify the network path as "\\the print server name (the computer name of the print server)\the printer name."
|
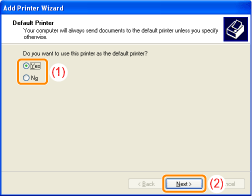
8
When the following screen appears, select whether or not to use this printer as the default printer.
|
(1)
|
If you want to use the printer as the default printer, select [Yes].
|
|
(2)
|
Click [Next].
|
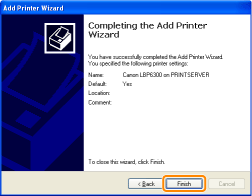
9
Click [Finish].
Windows 2000
1
Turn the computer on, and then log on to Windows.
2
Open the printer folder.
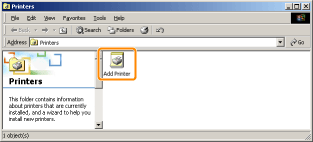
3
Double-click [Add Printer].
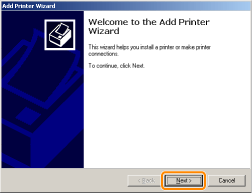
4
Click [Next].
5
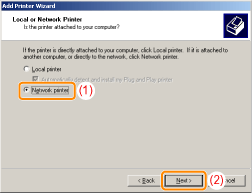
Select a printer type.
|
(1)
|
Select [Network printer].
|
|
(2)
|
Click [Next].
|
6
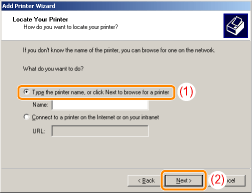
Perform the following procedure.
|
(1)
|
Select [Type the printer name, or click Next to browse for a printer].
|
|
(2)
|
Click [Next].
|
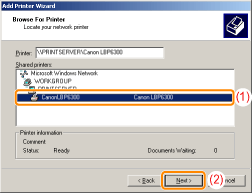
7
Select a shared printer.
|
(1)
|
Select a shared printer on the print server.
|
|
(2)
|
Click [Next].
|
|
NOTE
|
Specifying the network path directlySpecify the network path as "\\the print server name (the computer name of the print server)\the printer name."
|
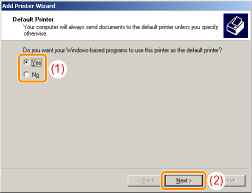
8
Select whether or not to use the printer as the default printer.
|
(1)
|
If you want to use the printer as the default printer, select [Yes].
|
|
(2)
|
Click [Next].
|
9
Click [Finish].
