Using NetSpot Device Installer
Procedure for Running NetSpot Device Installer
You can run NetSpot Device Installer in either of the following two ways.
Running the Installed NetSpot Device Installer
1
Run NetSpot Device Installer.
From the [Start] menu, select [All Programs] or [Programs] → [NetSpot Device Installer] → [NetSpot Device Installer].

 If NetSpot Device Installer is not found in the [Start] menu If NetSpot Device Installer is not found in the [Start] menuDouble-click [nsdi.exe] in the folder in which NetSpot Device Installer is installed.
  If the [User Account Control] dialog box appears If the [User Account Control] dialog box appearsClick [Continue] or [Yes].
|
Running NetSpot Device Installer Directly from the Supplied CD-ROM
1
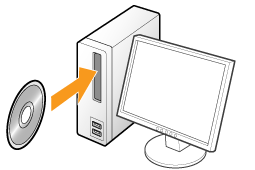
Insert the supplied CD-ROM "LBP6300 User Software" into the CD-ROM drive of your computer.

2
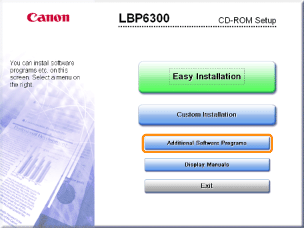
Click [Additional Software Programs].

 If the above screen does not appear If the above screen does not appear If the [AutoPlay] dialog box appears If the [AutoPlay] dialog box appearsClick [Run AUTORUN.EXE].
  If the [User Account Control] dialog box appears If the [User Account Control] dialog box appearsClick [Continue] or [Yes].
|
3
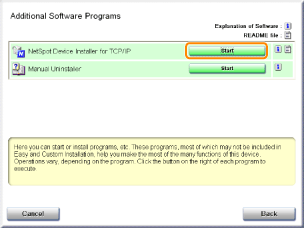
Click [Start] for [NetSpot Device Installer for TCP/IP].
If [License Agreement] appears, read the contents, and then click [Yes].

How to use NetSpot Device Installer
NetSpot Device Installer allows you to configure the basic protocol settings and display the statuses of various printers on a network.
For details on the procedure for setting the IP address, see "Setting the IP Address Using NetSpot Device Installer."
For more details on the other usage, see Help.
 |
Help is displayed by clicking [Help] in the [Help] menu.
|
 "
"