Easy Installation (via the Print Server)
 |
For details on the procedure before selecting an installation method (the procedure before Step 1), see "Easy Installation."
|
1
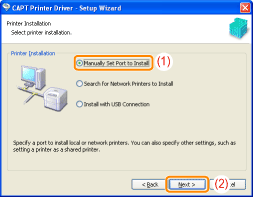
Select the method of installation.
|
(1)
|
Select [Manually Set Port to Install].
|
|
(2)
|
Click [Next].
|
2
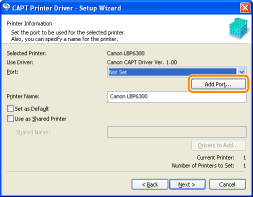
Click [Add Port].
3
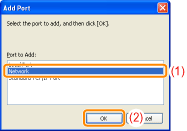
Select a port to be added.
|
(1)
|
Select [Network].
|
|
(2)
|
Click [OK].
|
4
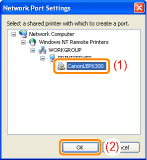
Select a shared printer.
|
(1)
|
Select a shared printer on the print server.
|
|
(2)
|
Click [OK].
|
5
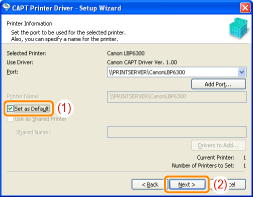
Select whether or not to use the printer as the default printer.
|
(1)
|
If you want to use the printer as the default printer, select the [Set as Default] check box.
|
|
(2)
|
Click [Next].
|
6
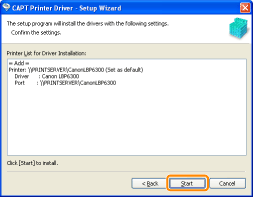
Click [Start].
7
Click [Yes].

|
→
|
The installation starts.
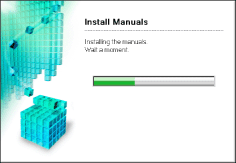
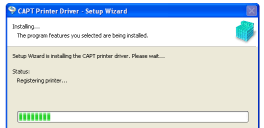 Wait until the following screen disappears. (It may take a long time to install the printer driver.)
 |
 If the [Printers] dialog box appears If the [Printers] dialog box appearsClick [Install driver].
|
8
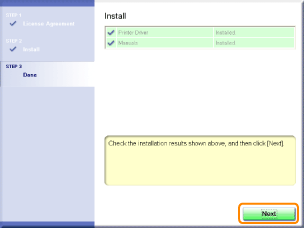
Confirm that [  ] appears in [Install], and then click [Next].
 ] appears in [Install], and then click [Next].
 If [ If [  ] appears ] appears |
9
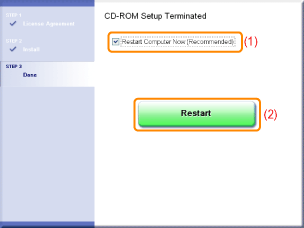
Restart your computer.
|
(1)
|
Select the [Restart Computer Now (Recommended)] check box.
|
|
(2)
|
Click [Restart].
|
 |
When the following screen appears, you can remove the CD-ROM.
|
|
When the installation is complete, an icon and folder for this printer will be created.
 "After Installation" "After Installation" |