IPv4 Settings
 |
For details on the procedure before displaying the [TCP/IP Settings] page (the procedure before Step 1), see "Configuring the Protocol Settings."
|
1
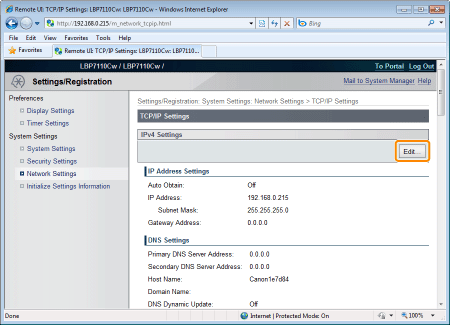
Click [Edit] in [IPv4 Settings].
2
Set the IP address.
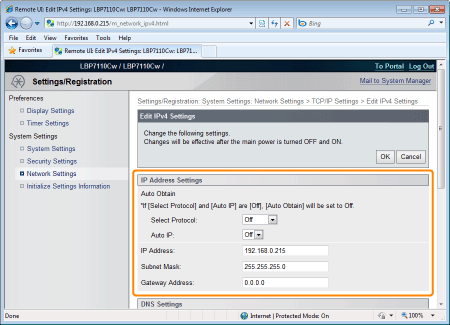
When obtaining the IP address automatically
Use DHCP, BOOTP, RARP, or Auto IP to obtain the IP address automatically.
|
[Select Protocol]
|
[Off]
An IP address that uses RARP, BOOTP, or DHCP cannot be obtained automatically.
[DHCP]
Obtains an IP address using DHCP. (The DHCP server needs to be running.)
[BOOTP]
Obtains an IP address using BOOTP. (The BOOTP daemon needs to be running.)
[RARP]
Obtains an IP address using RARP. (The RARP daemon needs to be running.)
|
|
[Auto IP]
|
[Off]
An IP address that uses Auto IP cannot be obtained automatically.
[On]
The printer obtains the IP address automatically.
|
When setting the IP address manually
Allows you to directly set the IP address manually.
|
[Select Protocol]
|
Select [Off].
|
|
[Auto IP]
|
|
|
[IP Address]
|
Enter the IP address of the printer.
|
|
[Subnet Mask]
|
Enter the subnet mask that is used on the TCP/IP network.
|
|
[Gateway Address]
|
Enter the gateway address that is being used on the TCP/IP network.
|
3
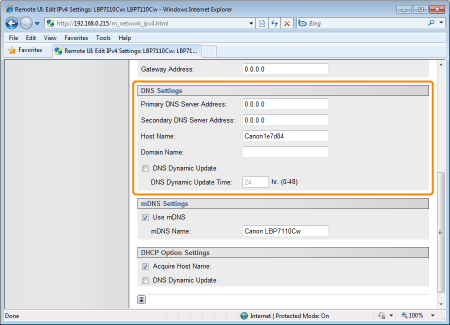
Specify the DNS.
Proceed to Step 4 when not using DNS.
|
[Primary DNS Server Address]
|
Enter the IP address of the primary DNS server.
|
|
[Secondary DNS Server Address]
|
Enter the IP address of the secondary DNS server.
|
|
[Host Name]
|
Enter the host name to be added to the DNS server. You can enter up to 47 single-byte alphanumeric characters.
|
|
[Domain Name]
|
Enter the name of the domain to which the printer belongs. You can enter up to 47 single-byte alphanumeric characters.
Input Example: "example.com"
|
|
[DNS Dynamic Update]
|
To use the DNS Dynamic Update function, select the check box.
|
|
[DNS Dynamic Update Time]
|
Specify the interval at which to perform the dynamic update.
|
Specify the mDNS.
Proceed to Step 5 when not using mDNS.

|
[Use mDNS]
|
To use mDNS settings, select the check box.
|
|
[mDNS Name]
|
Enter the mDNS name.
|
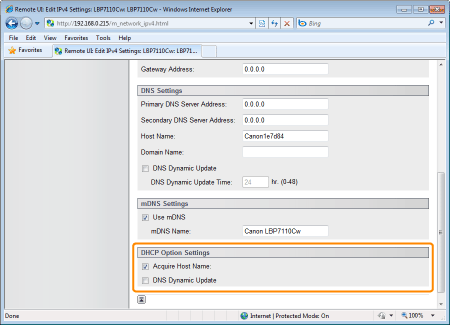
Specify the DHCP options.
Proceed to Step 6 when not using DHCP options.
|
[Acquire Host Name]
|
To obtain the host name from the DHCP server, select the check box.
|
|
[DNS Dynamic Update]
|
To dynamically update the obtained host name, select the check box.
|
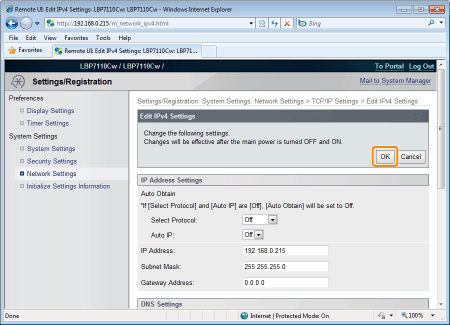
Click [OK].
7
Restart the printer.
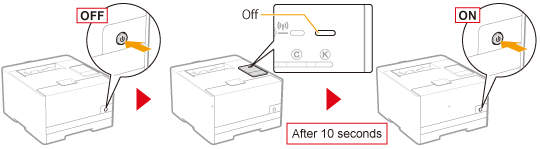
Turn the printer OFF, make sure that the Main Power indicator is off, wait for 10 seconds or longer, and then turn it ON again.
|
→
|
After the printer is restarted, the settings become effective.
|